Using the API Page of Onyx Cloud Database
Welcome to the API Documentation Guide for Onyx Cloud Database. This guide will help you effectively utilize the interactive API documentation to manage and interact with your databases.
Overview
The API Page provides interactive documentation for your selected database, allowing you to explore available endpoints, generate SDKs, authenticate requests, and execute API calls directly from the interface.
Accessing the API Page
To begin using the API Page, follow these steps:
Select Your Database
From the dashboard, select the database you want to interact with. This will load the API documentation specific to that database.
Access the API Documentation
Click on the API Documentation tab in the sidebar to open the interactive API documentation page.
Authentication
Secure your API interactions by configuring authentication headers.
Locate Auth Headers Section
In the API documentation page, find the Auth Headers section.
Enter Your API Keys
Provide your x-onyx-key and x-onyx-secret in the respective input fields to authenticate your API requests.

Save Authentication Details
After entering your keys, ensure they are saved correctly. These headers will be included in all API requests you make from the documentation.
Supported Client Libraries
Leverage official client libraries for streamlined integration with Onyx Cloud Database.
Locate the Supported Client Libraries Section
Scroll to the Supported Client Libraries section on the API documentation page.
Select Your Preferred Library
Click a language label to open its client library repository in a new tab. Currently only the TypeScript library is available.
Follow the Library Instructions
Use the repository instructions to install and integrate the client library with your applications.
Exploring Endpoints
Discover and understand the various API endpoints available for interacting with your database.
View Grouped Endpoints by Tags
Endpoints are organized under different tags (e.g., Users, Products) for better navigation. Each tag represents a category of related API functionalities.
Select an Endpoint to View Details
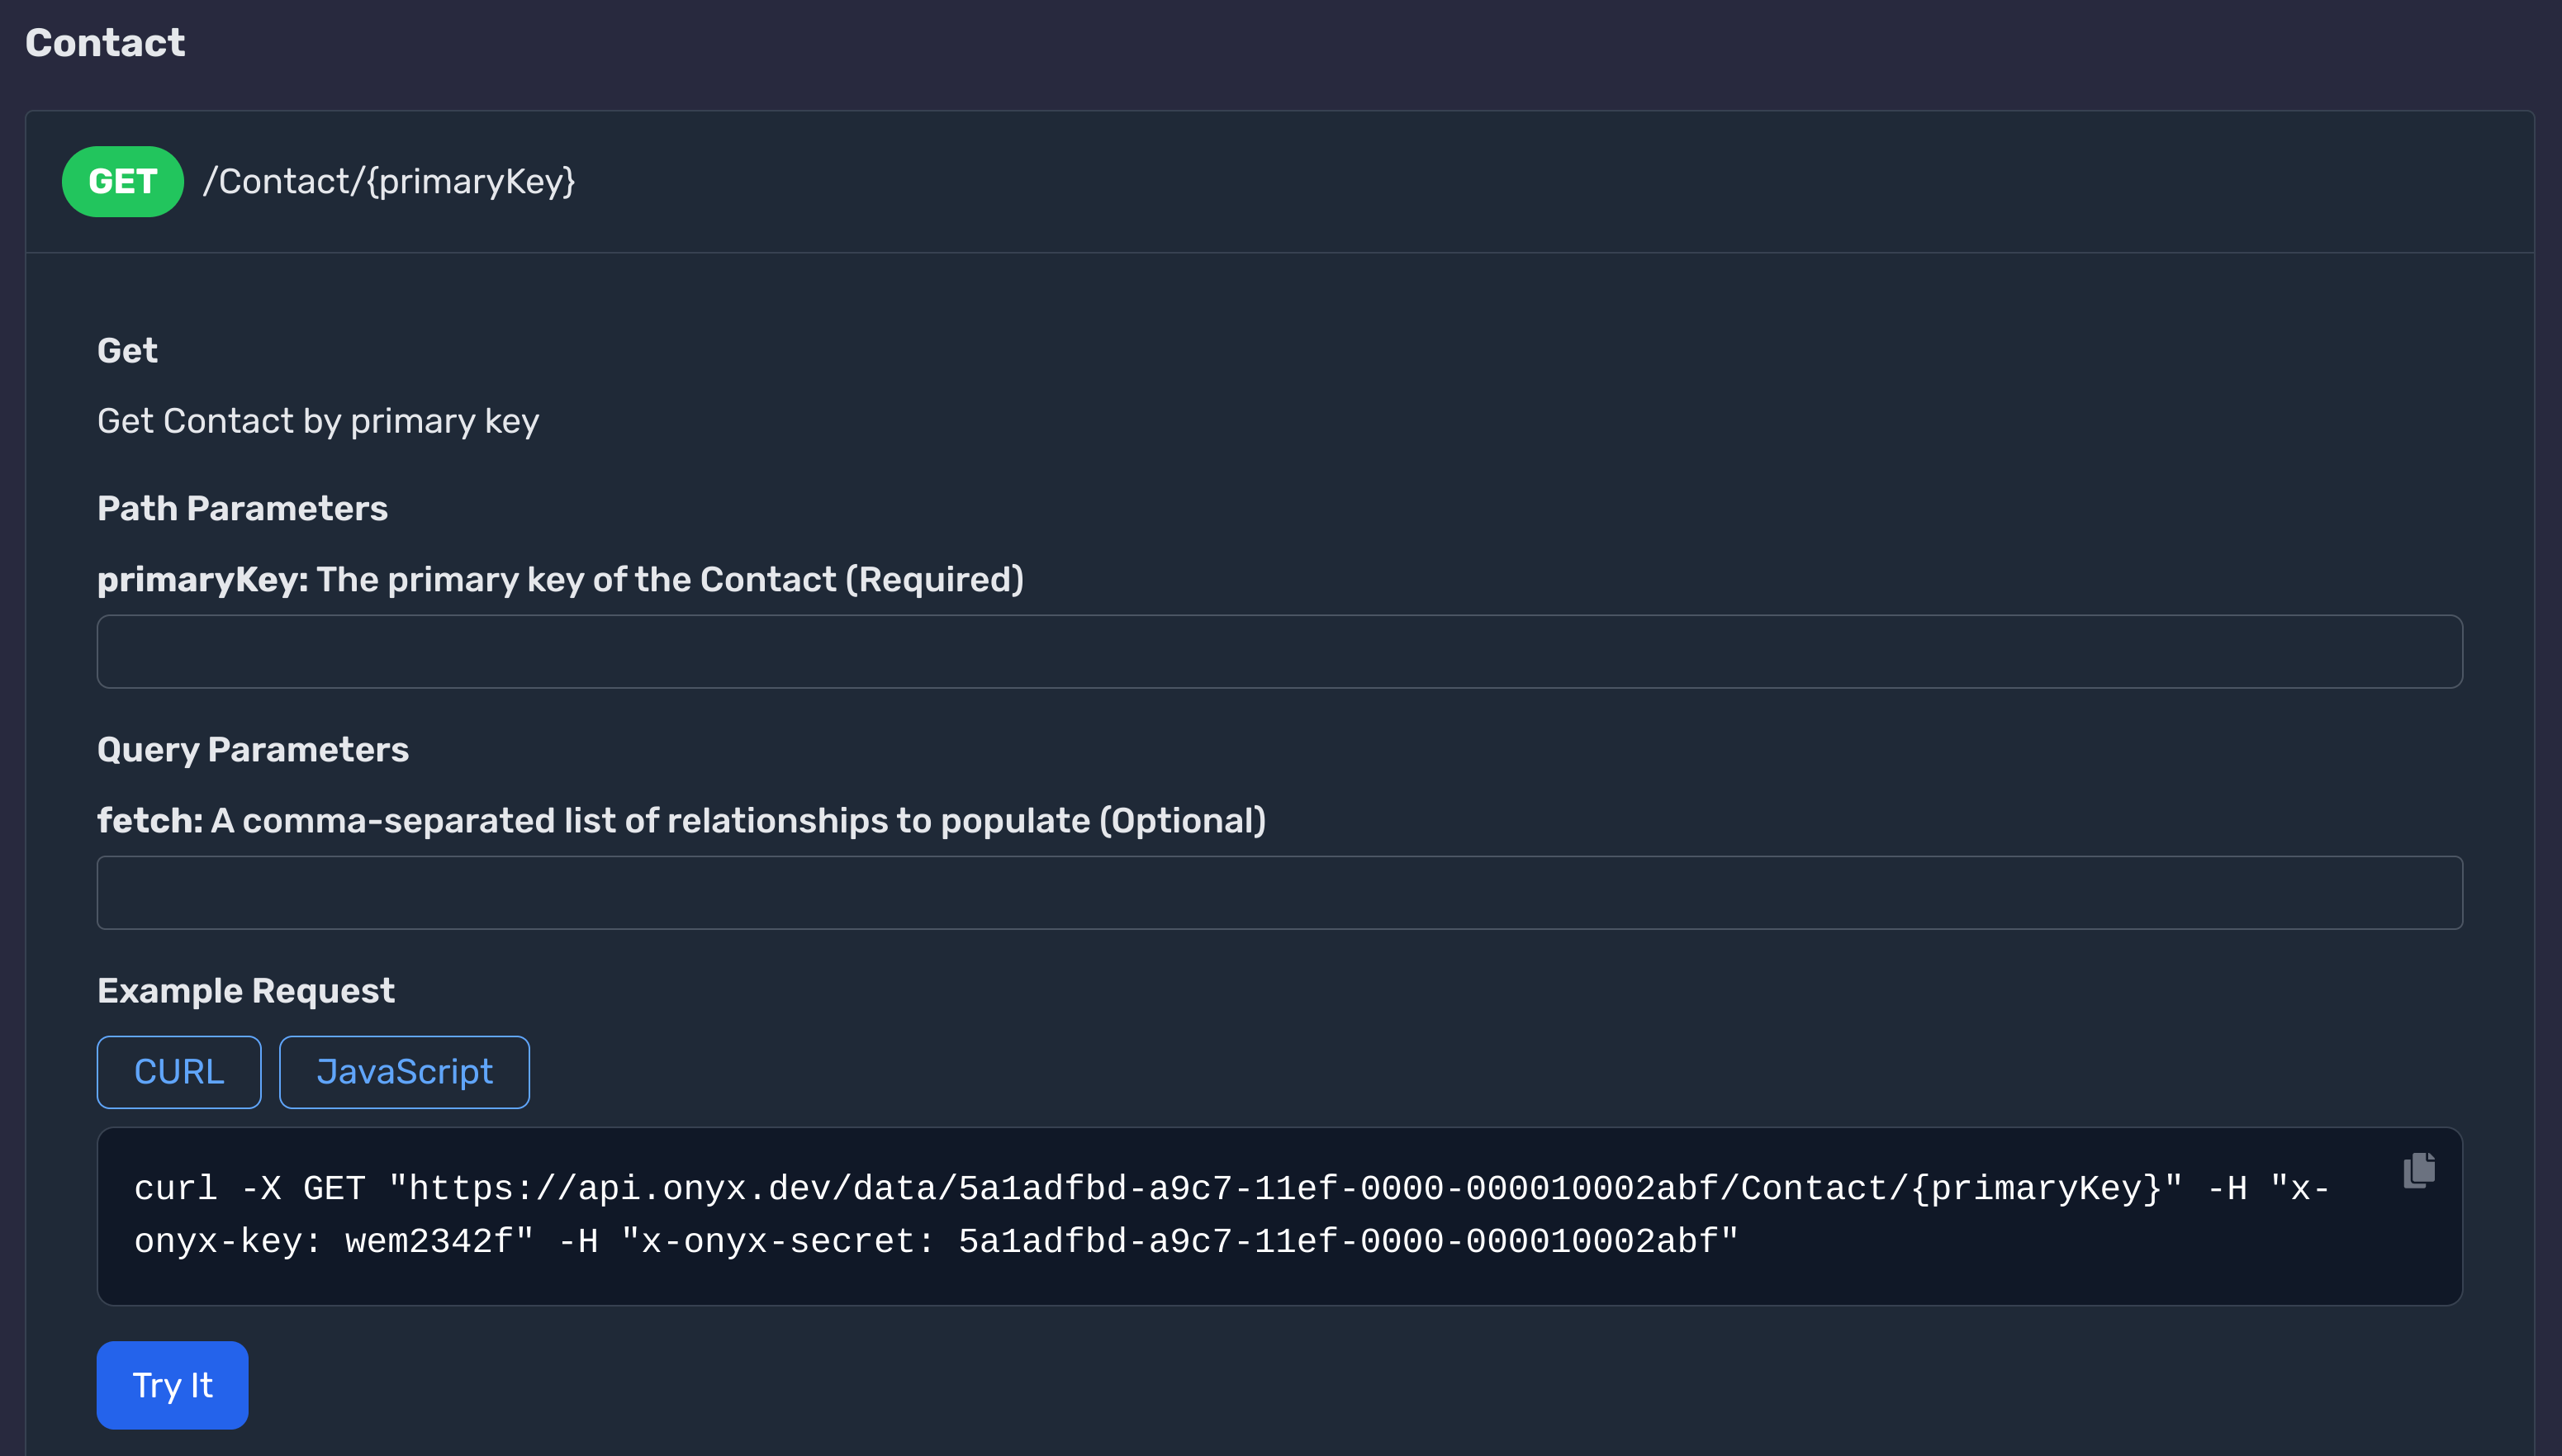
Click on any endpoint to expand its details, including the HTTP method, path, description, parameters, and responses.

Making API Calls
Execute API calls directly from the documentation to interact with your database.
Select the Desired Endpoint
Navigate to the endpoint you wish to interact with and click to expand its details.
Provide Required Parameters
Fill in any required path or query parameters in the provided input fields. Ensure all mandatory fields are completed.
Enter Request Body (If Applicable)
For endpoints that require a request body, input the necessary JSON data. Use the example generator or your own schema to structure the data correctly.
Execute the API Call
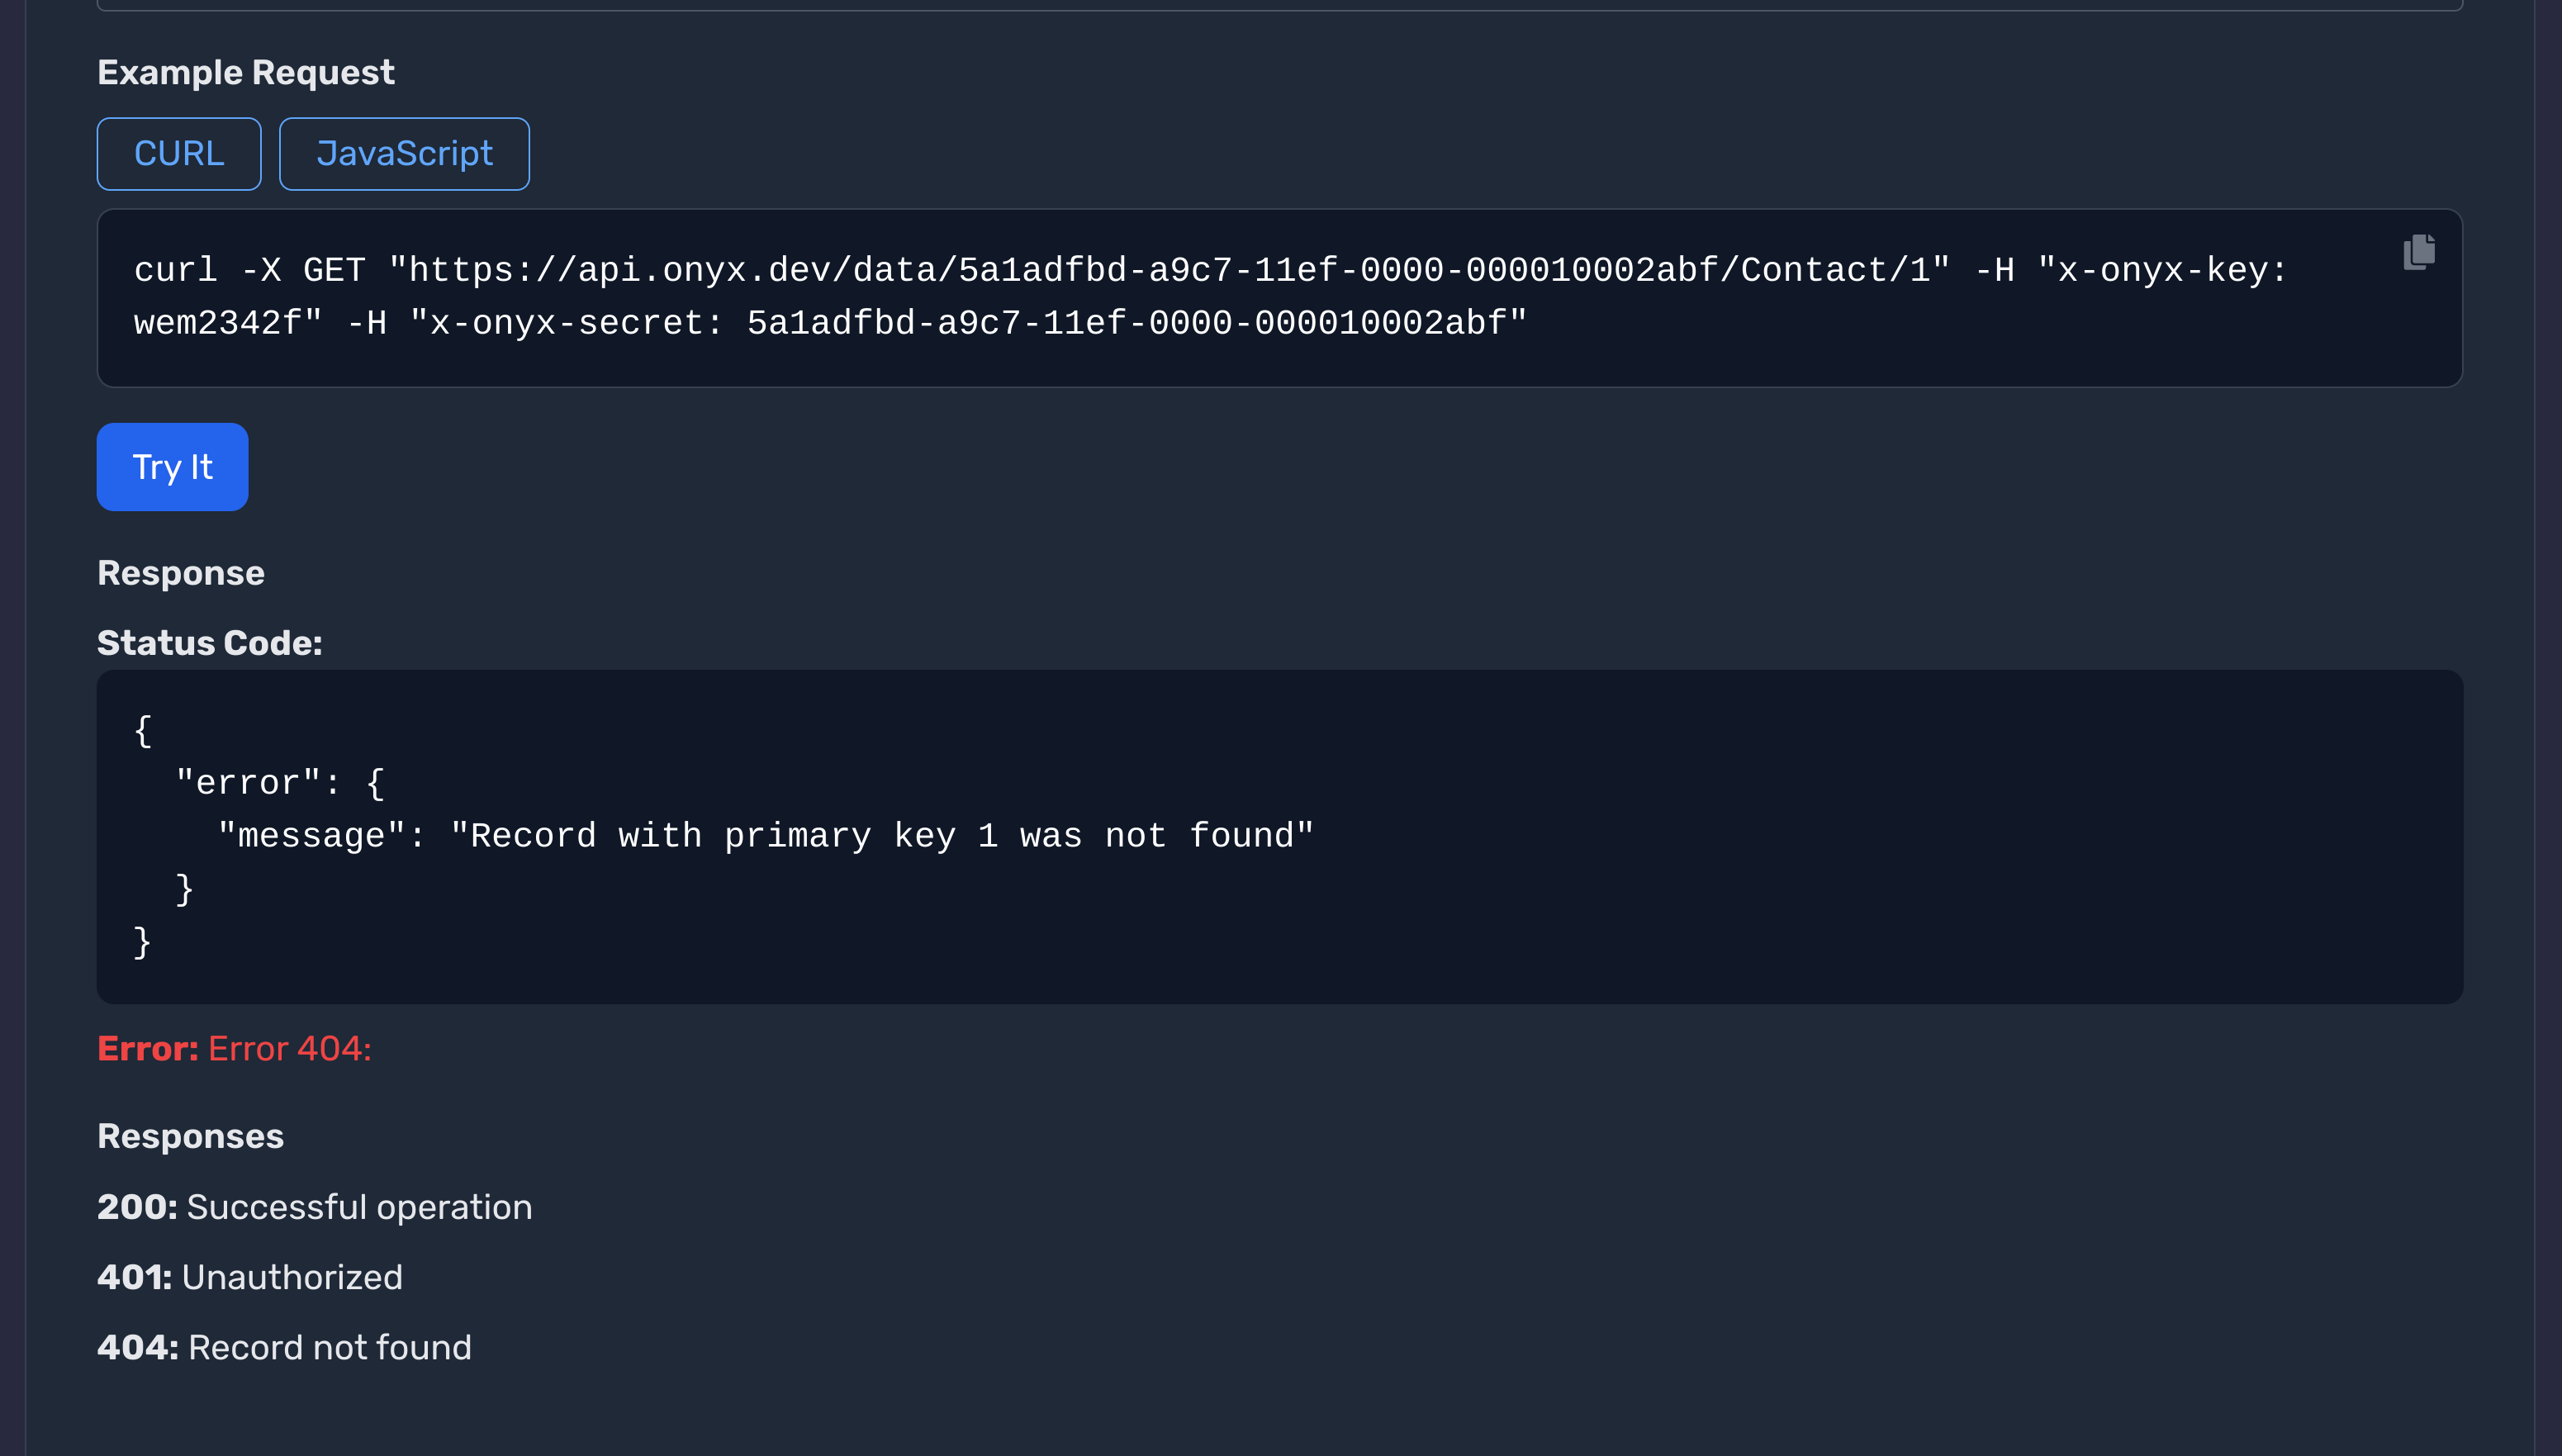
Click the Try It button to execute the API call. The response will be displayed below, including the status code and any returned data.
Handling Responses
Understand and interpret the responses returned from your API calls.
View the Status Code
Each API response includes a status code indicating the result of the request (e.g., 200 for success, 404 for not found).
Examine the Response Body
The response body contains the data returned by the API. It is typically formatted in JSON. Use this data to verify the results of your API calls.

Error Handling
Learn how to handle errors effectively when interacting with the API.
Identify the Error Code
When an API call fails, it returns an error status code (e.g., 400, 401, 500) along with a descriptive message.
Understand the Error Message
The error message provides details about why the request failed. Use this information to debug and correct your API call.
Implement Retry Logic
For transient errors (e.g., network issues), implement retry logic in your application to resend the request after a short delay.
Best Practices
Enhance your API integration with these best practices.
Secure Your API Keys
Never expose your x-onyx-key and x-onyx-secret in client-side code or public repositories.
Use SDKs for Efficiency
Leverage the generated SDKs to streamline your API interactions and reduce boilerplate code.
Handle Rate Limiting
Be mindful of API rate limits. Implement appropriate throttling mechanisms to avoid exceeding the allowed number of requests.
Validate Responses
Always validate the data returned by the API to ensure it meets your application's requirements.
Next Steps
Need Help?
If you have any questions or need assistance:
- Email:support@onyx.dev
- Documentation: Visit ourHelp Centerfor tutorials and FAQs.
