Creating an Organization in Onyx Cloud Database
This guide will walk you through the process of creating a new organization within your Onyx Cloud Database account. Follow the steps below to set up your organization efficiently.
Creating a New Organization
Follow these steps to create a new organization within your Onyx Cloud Database account.
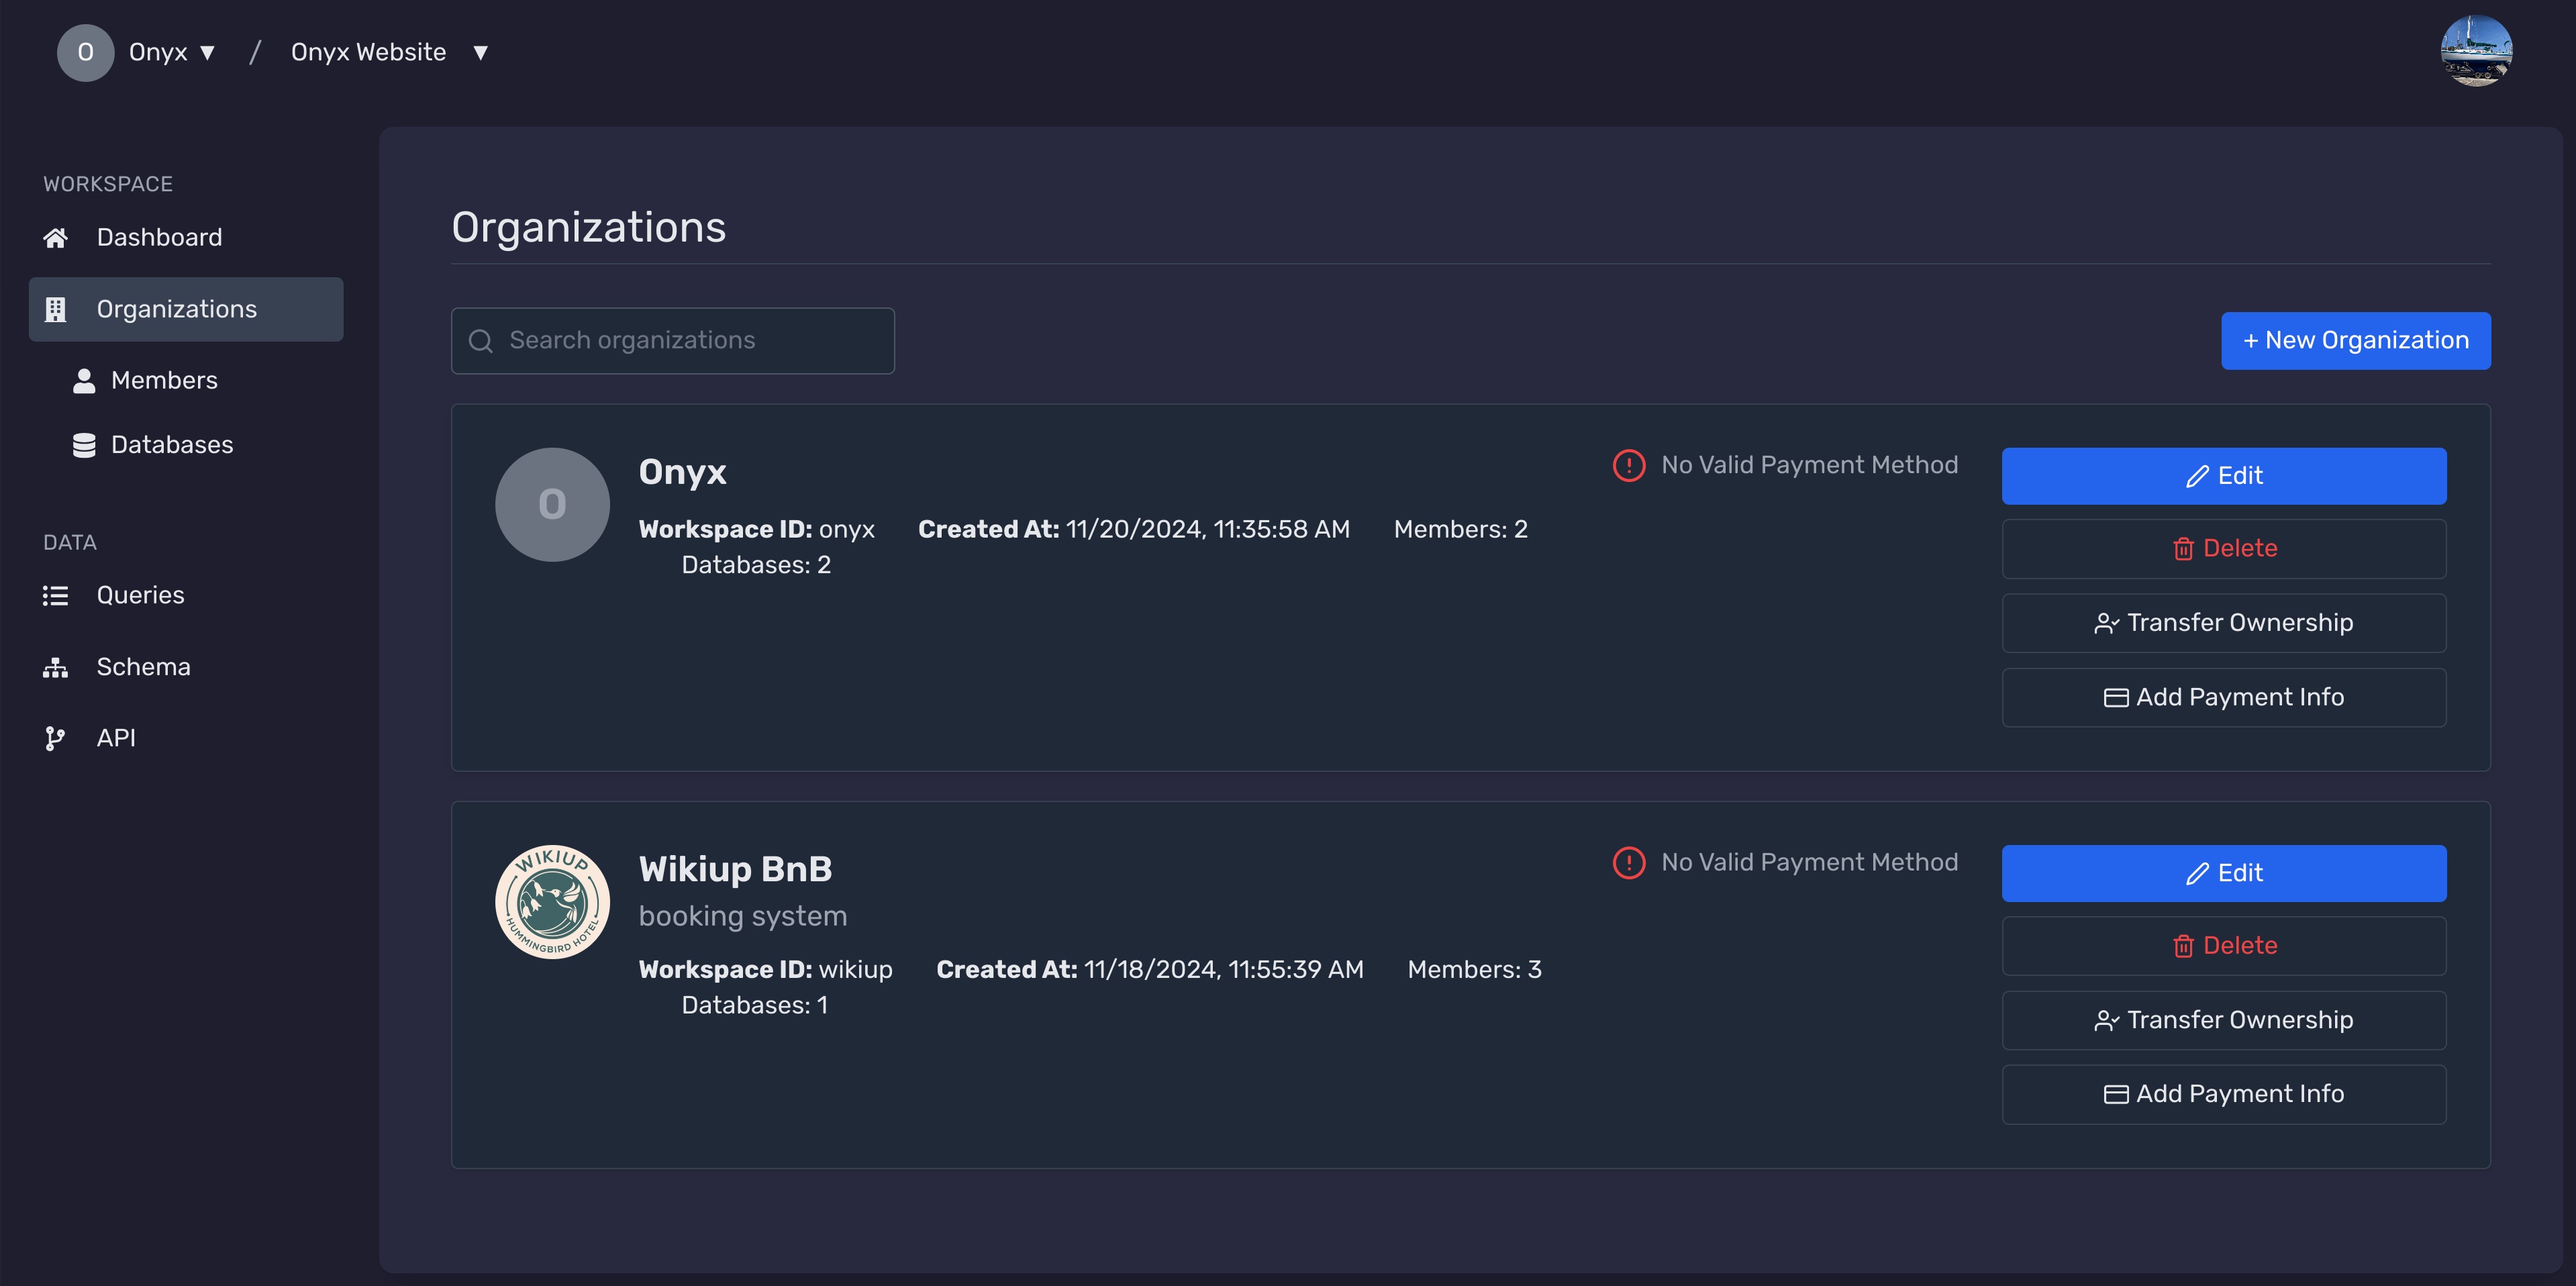
Open the Organizations Page
Ensure you are on the Organizations page by following the navigation steps above.

Click on '+ New Organization'
Locate and click the + New Organization button to open the organization creation modal.
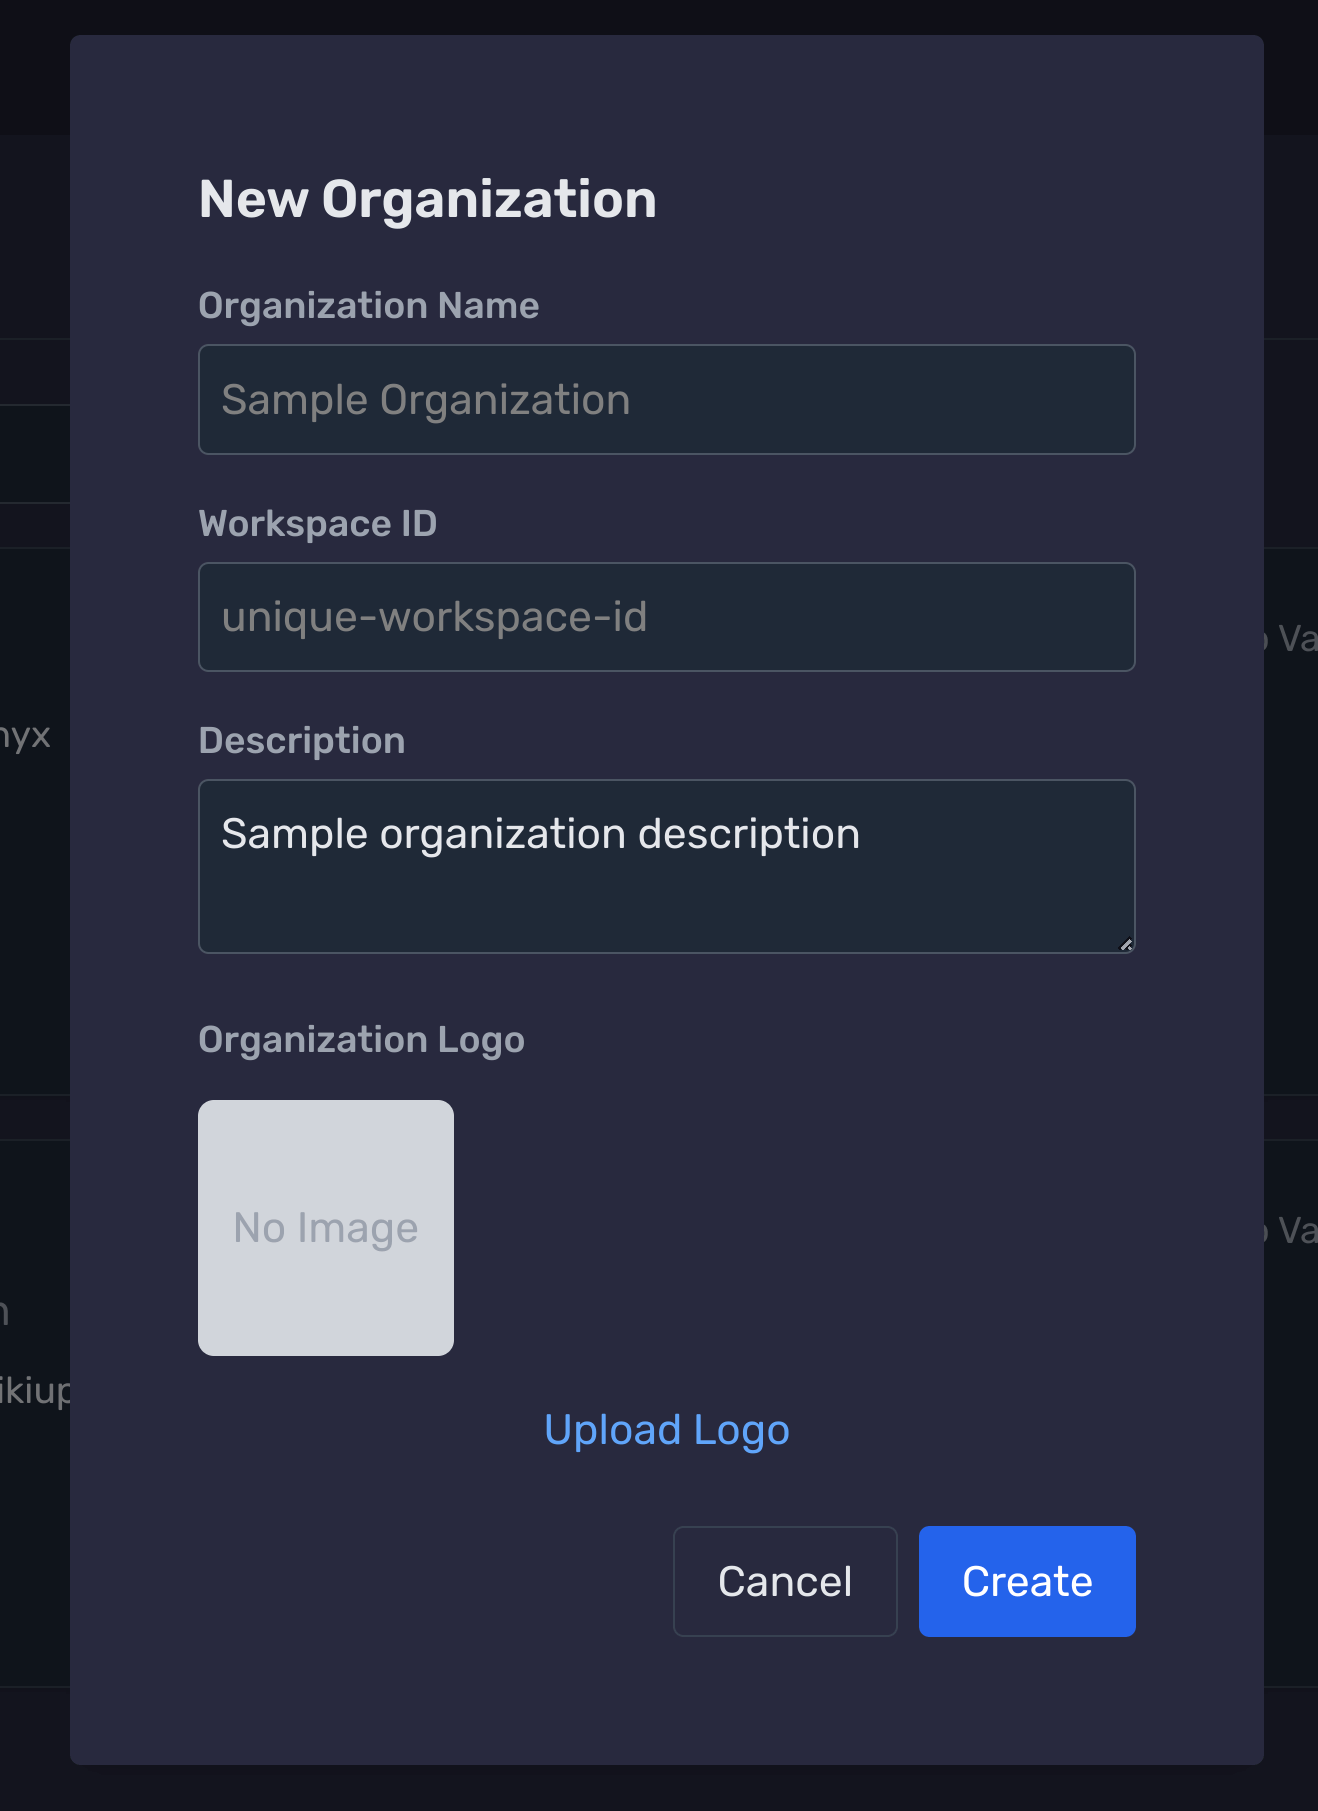
Fill in Organization Details
Provide the necessary information for your new organization:
- Organization Name: Enter a unique name for your organization.
- Workspace ID: Provide a unique workspace identifier.
- Description: (Optional) Add a brief description of your organization.

Upload an Organization Logo (Optional)
Personalize your organization by uploading a logo:
- Click on the Upload Logo button.
- Select an image from your device or choose a default avatar.
- The uploaded logo will appear in the preview area.

Submit the Form to Create the Organization
After filling in all required details, click the Create button to finalize the creation of your new organization.
Upon successful creation, you will be redirected to your organization's dashboard where you can manage its settings and members.
Next Steps
Need Help?
If you have any questions or need assistance:
- Email:support@onyx.dev
- Documentation: Visit ourHelp Centerfor tutorials and FAQs.
