Delete a Database in Onyx Cloud
This guide walks you through the steps to delete a database securely using the Onyx Cloud dashboard.
Introduction
Deleting a database permanently removes it from the Onyx Cloud. This action is irreversible, so ensure you no longer need the database or have backups before proceeding.
Open Delete Modal
To delete a database, locate it in the dashboard and follow these steps:
Navigate to Databases
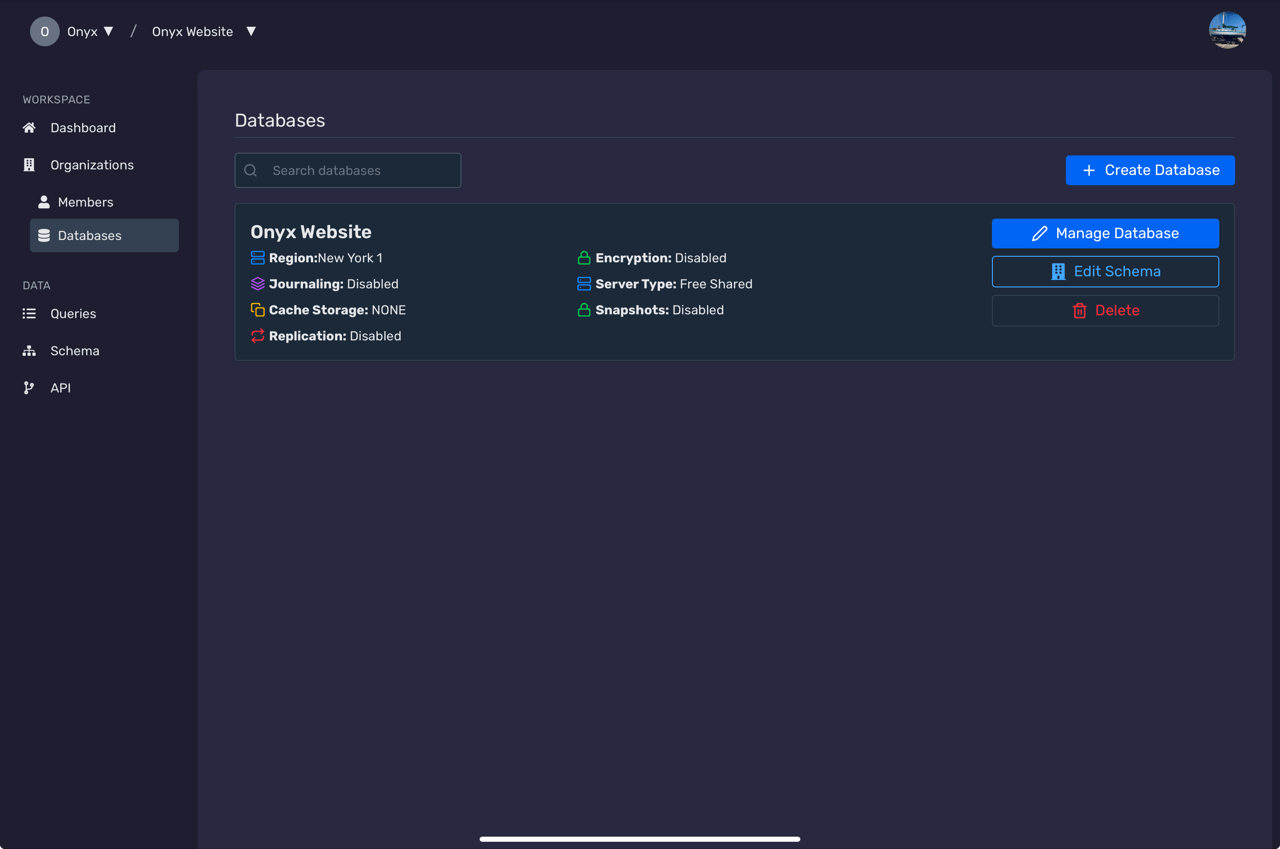
In the Onyx Cloud dashboard, go to the Databases section from the sidebar navigation.
Click Delete
Locate the database you want to delete and click the Delete button (represented by a trash icon).

Confirm Deletion
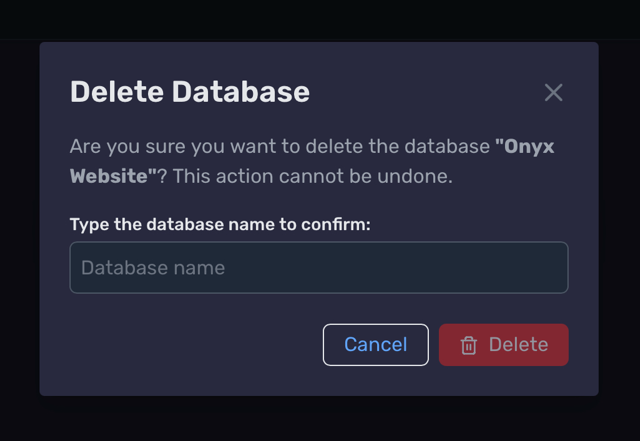
After clicking the delete button, a confirmation modal will appear:
Enter Database Name
Type the name of the database to confirm you want to delete it. This ensures accidental deletions are avoided.
Click Delete
Once the name matches, click the Delete button to finalize the deletion.
If successful, a toast notification will confirm the database has been deleted.

Next Steps
Need Help?
If you have any questions or need assistance:
- Email:support@onyx.dev
- Documentation: Visit ourHelp Centerfor tutorials and FAQs.