Creating a Database in Onyx Cloud
Learn how to create a database in Onyx Cloud using our dashboard. This guide will walk you through each step, from defining the database details to configuring optional settings.
Steps to Create a Database
1
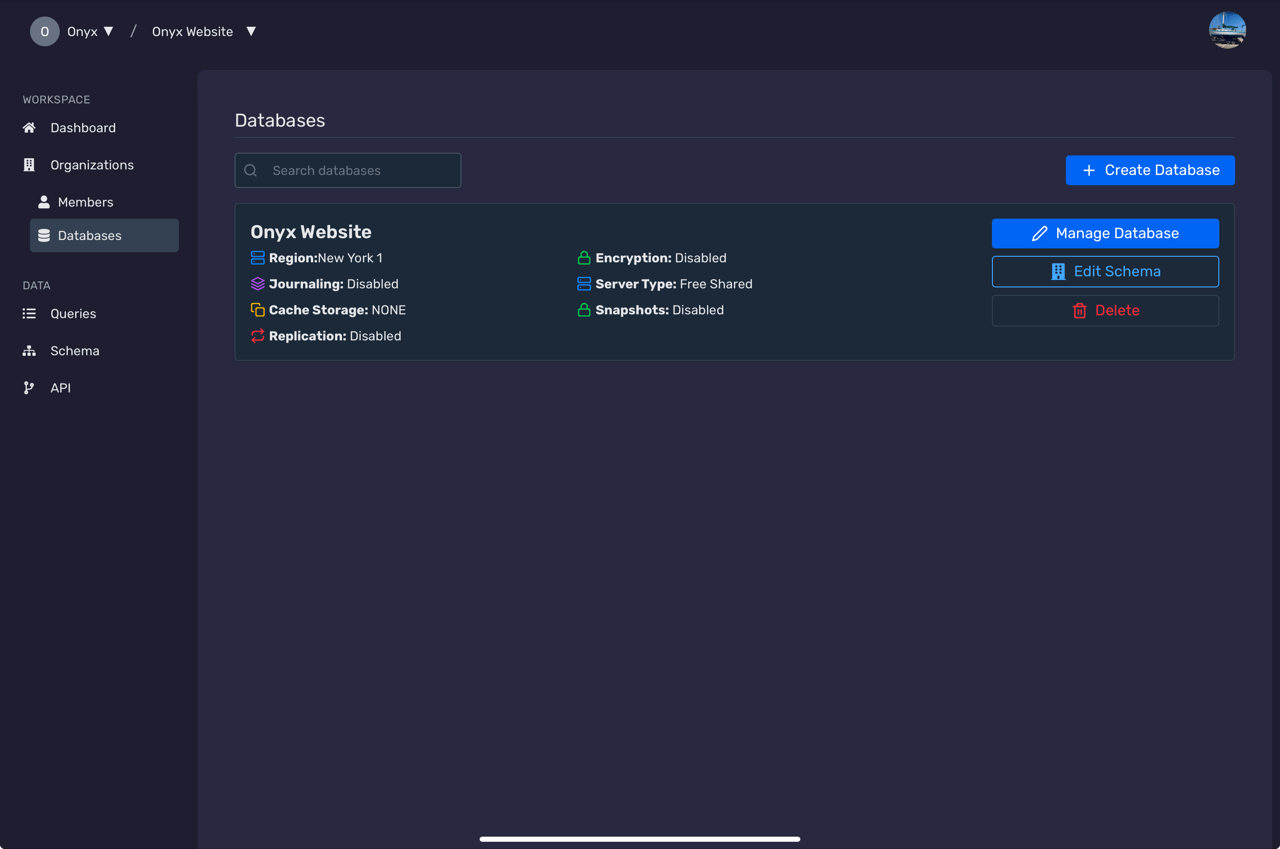
Navigate to the databases page
Open the Onyx Cloud dashboard and select Databases from the sidebar menu.

3
Fill Out Database Details
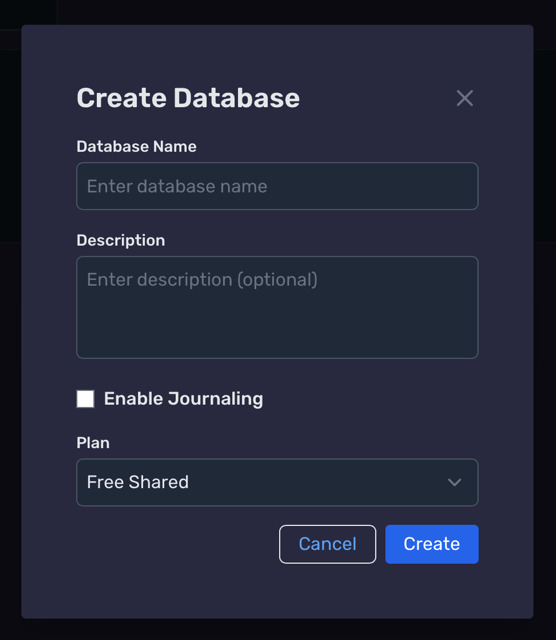
Complete the database creation form with the following fields:
- Database Name: Provide a unique name for your database.
- Description: Add an optional description for the database.
- Plan: Select the desired database plan (e.g., Basic Shared, Dedicated).
- Region: Choose a region for your database (e.g., New York 1, Amsterdam 3).

4
Configure Optional Settings
Set up additional configurations based on your needs:
- Enable Encryption: Ensure your database data is encrypted.
- Enable Journaling: Keep track of changes for improved data recovery.
5
Complete and save
Review your inputs and click Create to finalize the process.
Your new database will appear in the list on the Databases page once created.
Next Steps
Need Help?
If you have any questions or need assistance:
- Email:support@onyx.dev
- Documentation: Visit ourHelp Centerfor tutorials and FAQs.