Cloning a Database in Onyx Cloud
Cloning a database allows you to create an exact replica of your existing database. This is useful for testing, development, or creating backups.
Introduction
Cloning a database involves duplicating all its data and configurations to create a new, independent database. This guide will walk you through the steps to clone a database using the Onyx Cloud Dashboard.
Pre-requisites
Before you begin cloning a database, ensure you have the following:
- An active Onyx Cloud Database account.
- Access to the database you wish to clone.
- Sufficient permissions to perform cloning operations.
Cloning Process
Follow these steps to clone your database:
Access the Database Management Page
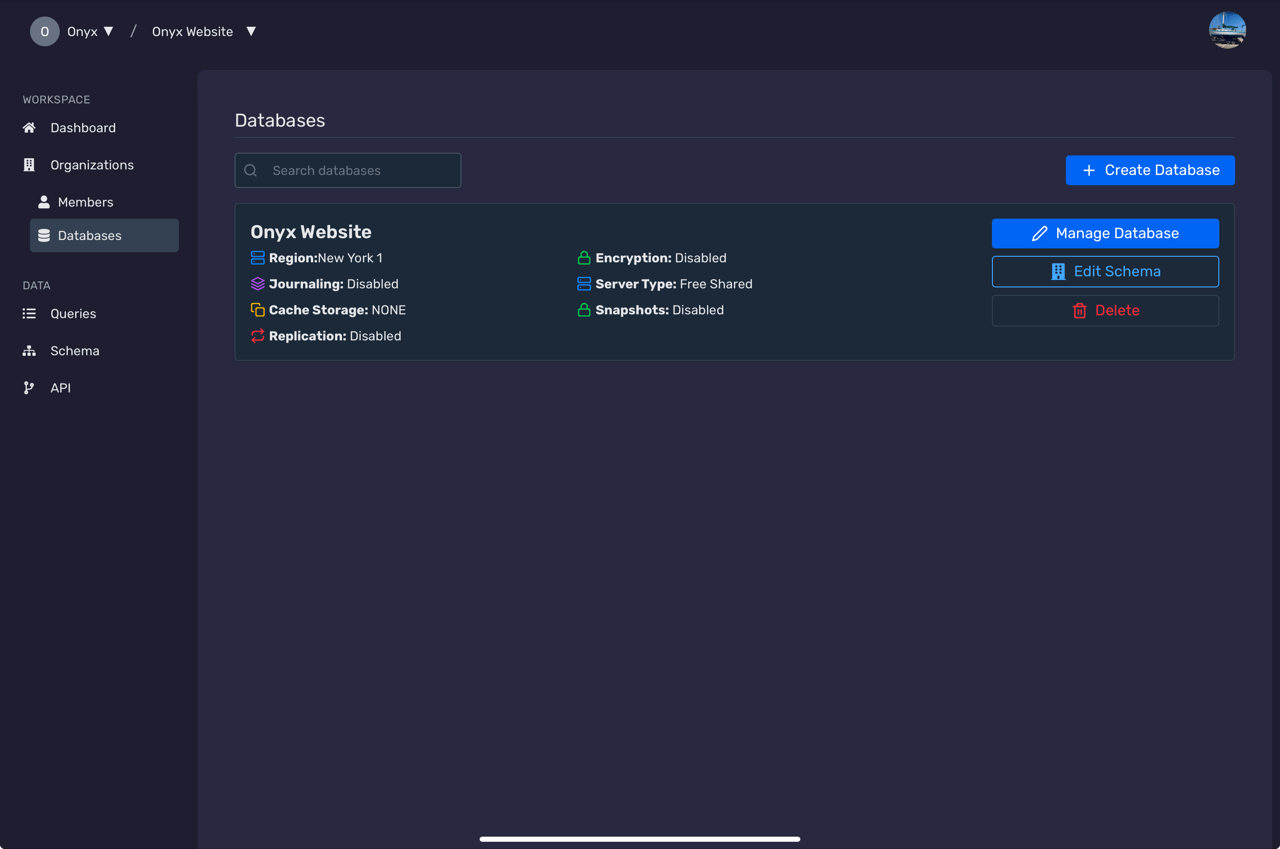
Log in to your Onyx Cloud Dashboard and navigate to the Databases section.

Select the Database to Clone
From the list of databases, click on the button Manage Database for the database you wish to clone to open its details page.

Initiate the Clone Action
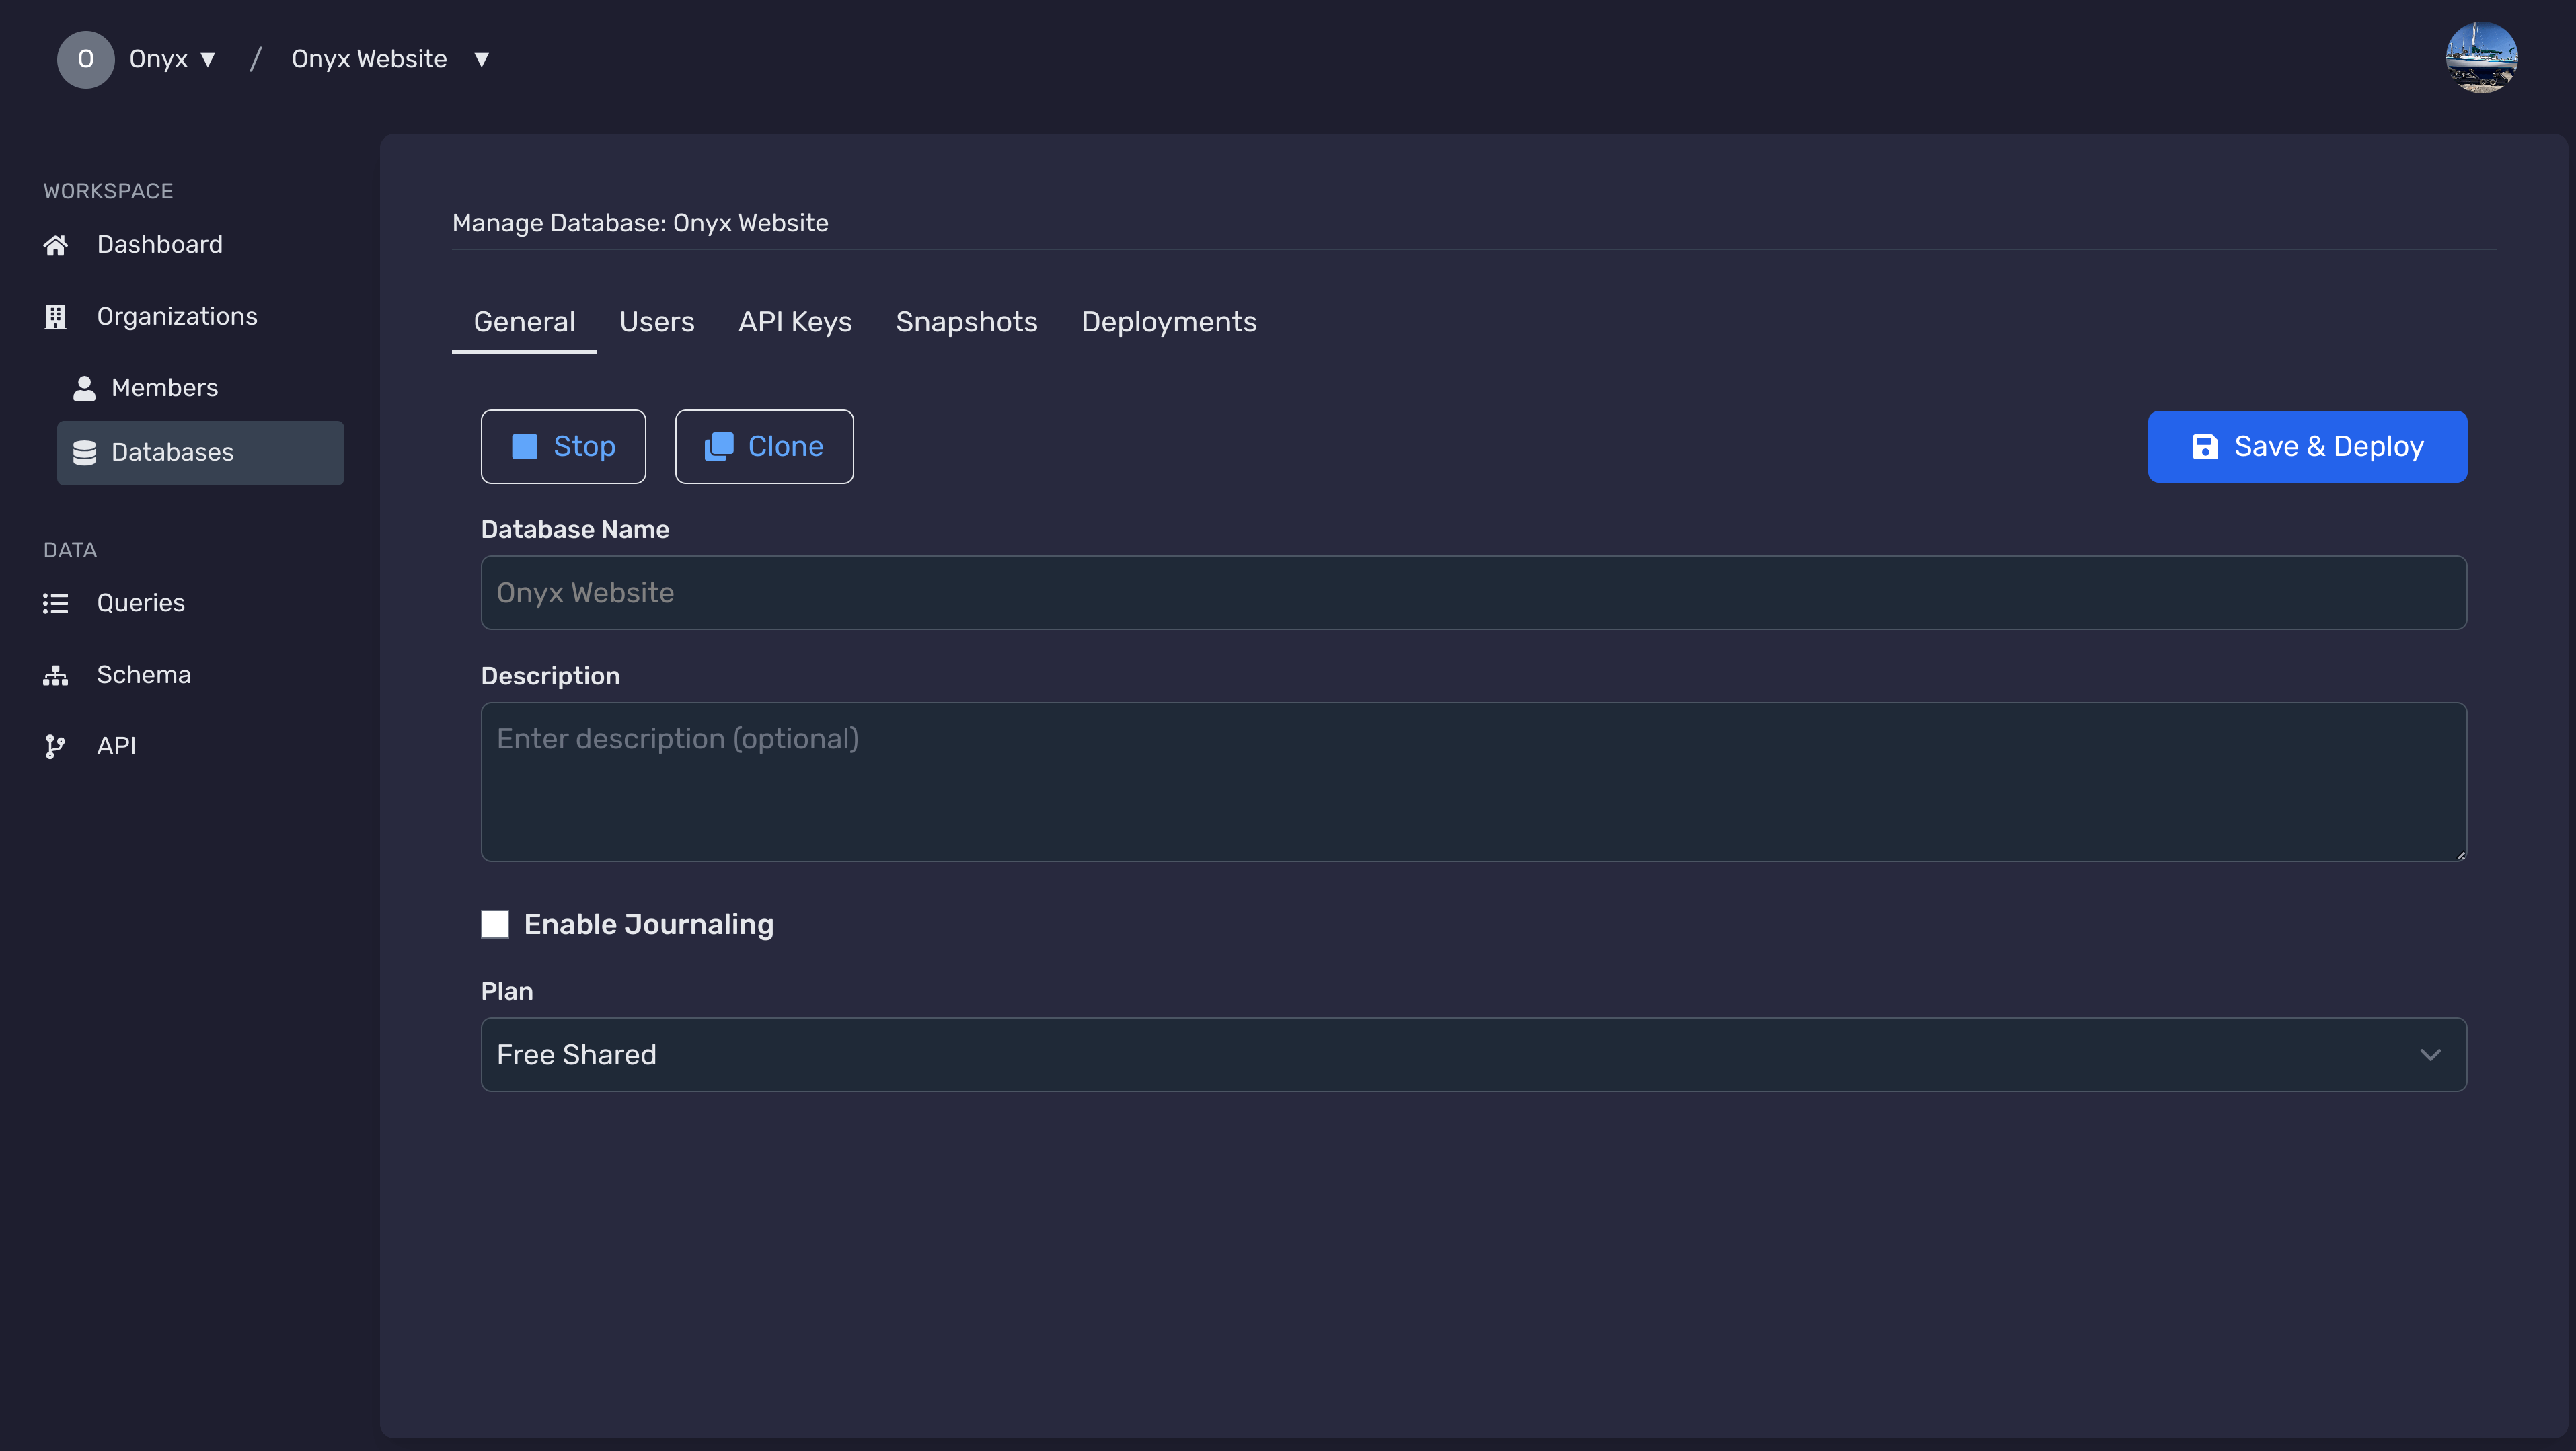
In the General Info tab, locate the Clone button and click on it to start the cloning process.
Configure Clone Settings
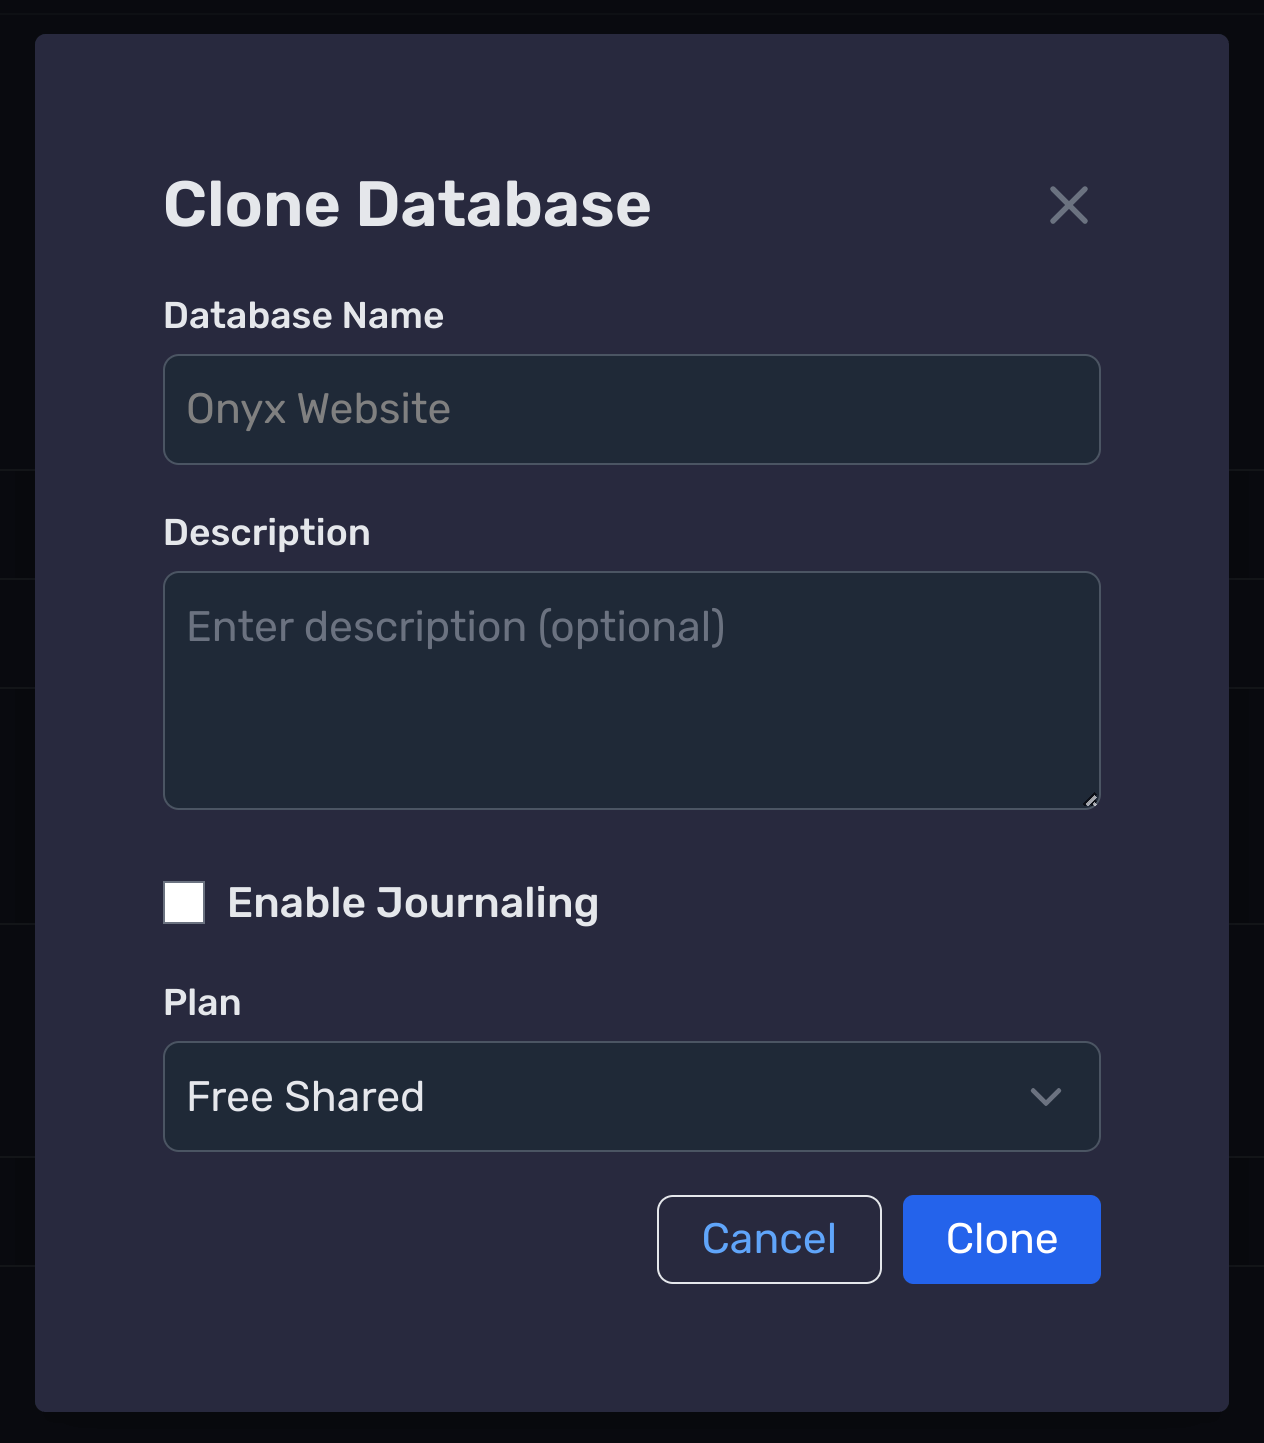
A modal will appear prompting you to configure the clone settings. Provide the necessary details:
- New Database Name: Enter a unique name for the cloned database.
- Region: Select the region where you want the cloned database to reside.
- Configuration Settings: Adjust any specific settings as needed.

Confirm and Start Cloning
After configuring the settings, click the Clone Database button to initiate the cloning process. A confirmation message will appear once the process starts.
Monitor Cloning Progress
Navigate to the Deployments tab to monitor the progress of the cloning operation. Once completed, the cloned database will appear in your list of databases.
Next Steps
Need Help?
If you have any questions or need assistance:
- Email:support@onyx.dev
- Documentation: Visit ourHelp Centerfor tutorials and FAQs.