Managing Database Users and Permissions
This guide will help you manage users and their permissions within your Onyx Cloud Database. Learn how to invite new users, change user roles, and remove users to maintain a secure and organized database environment.
Overview
Managing users and permissions is crucial for maintaining the security and integrity of your database. This guide walks you through the processes of accessing the users page, inviting new users, assigning roles, and removing users.
Accessing the Database Users Page
To manage users, first navigate to the Database Users page within your selected database.
Log in to Your Dashboard
Sign in to your Onyx Cloud Database account and access your dashboard.

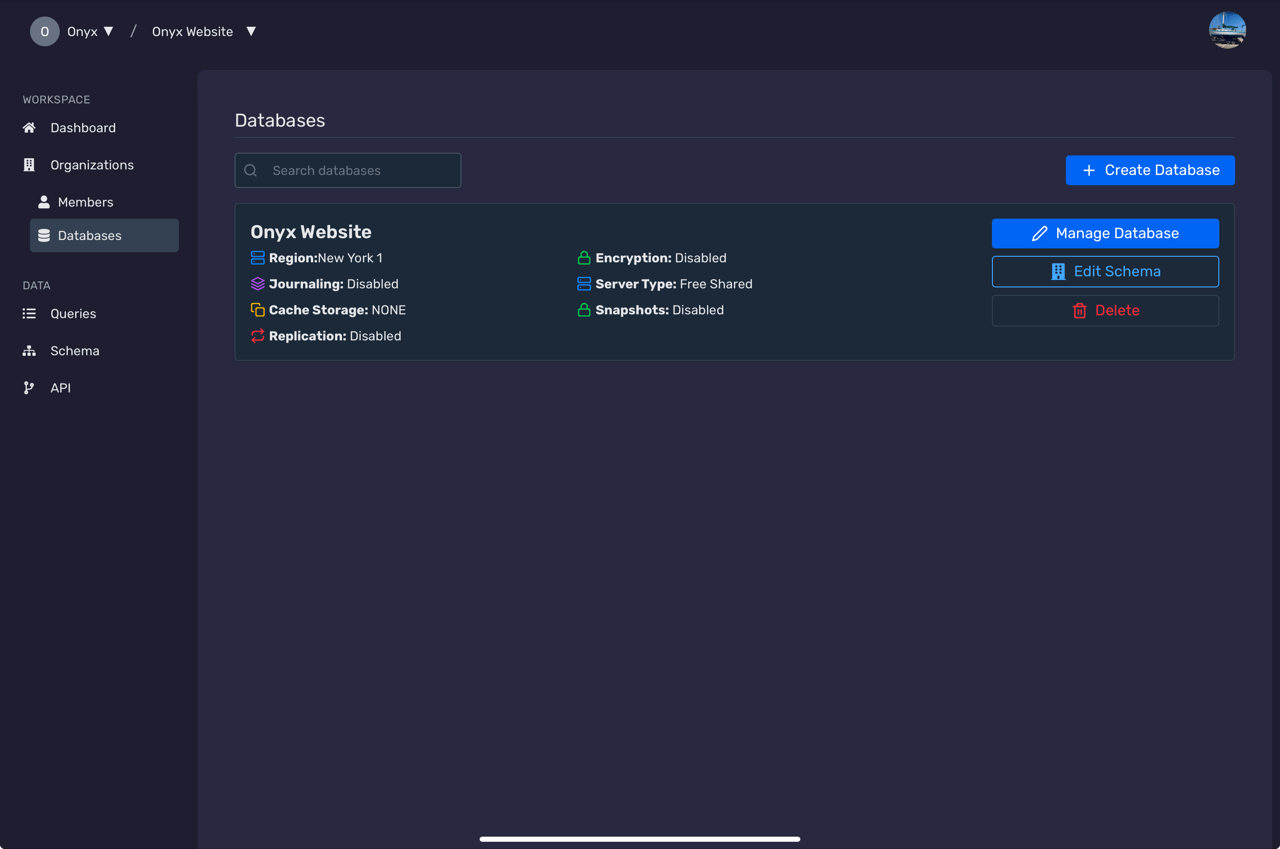
Select Your Database
From the dashboard, select the database you want to manage.

Navigate to Users Section
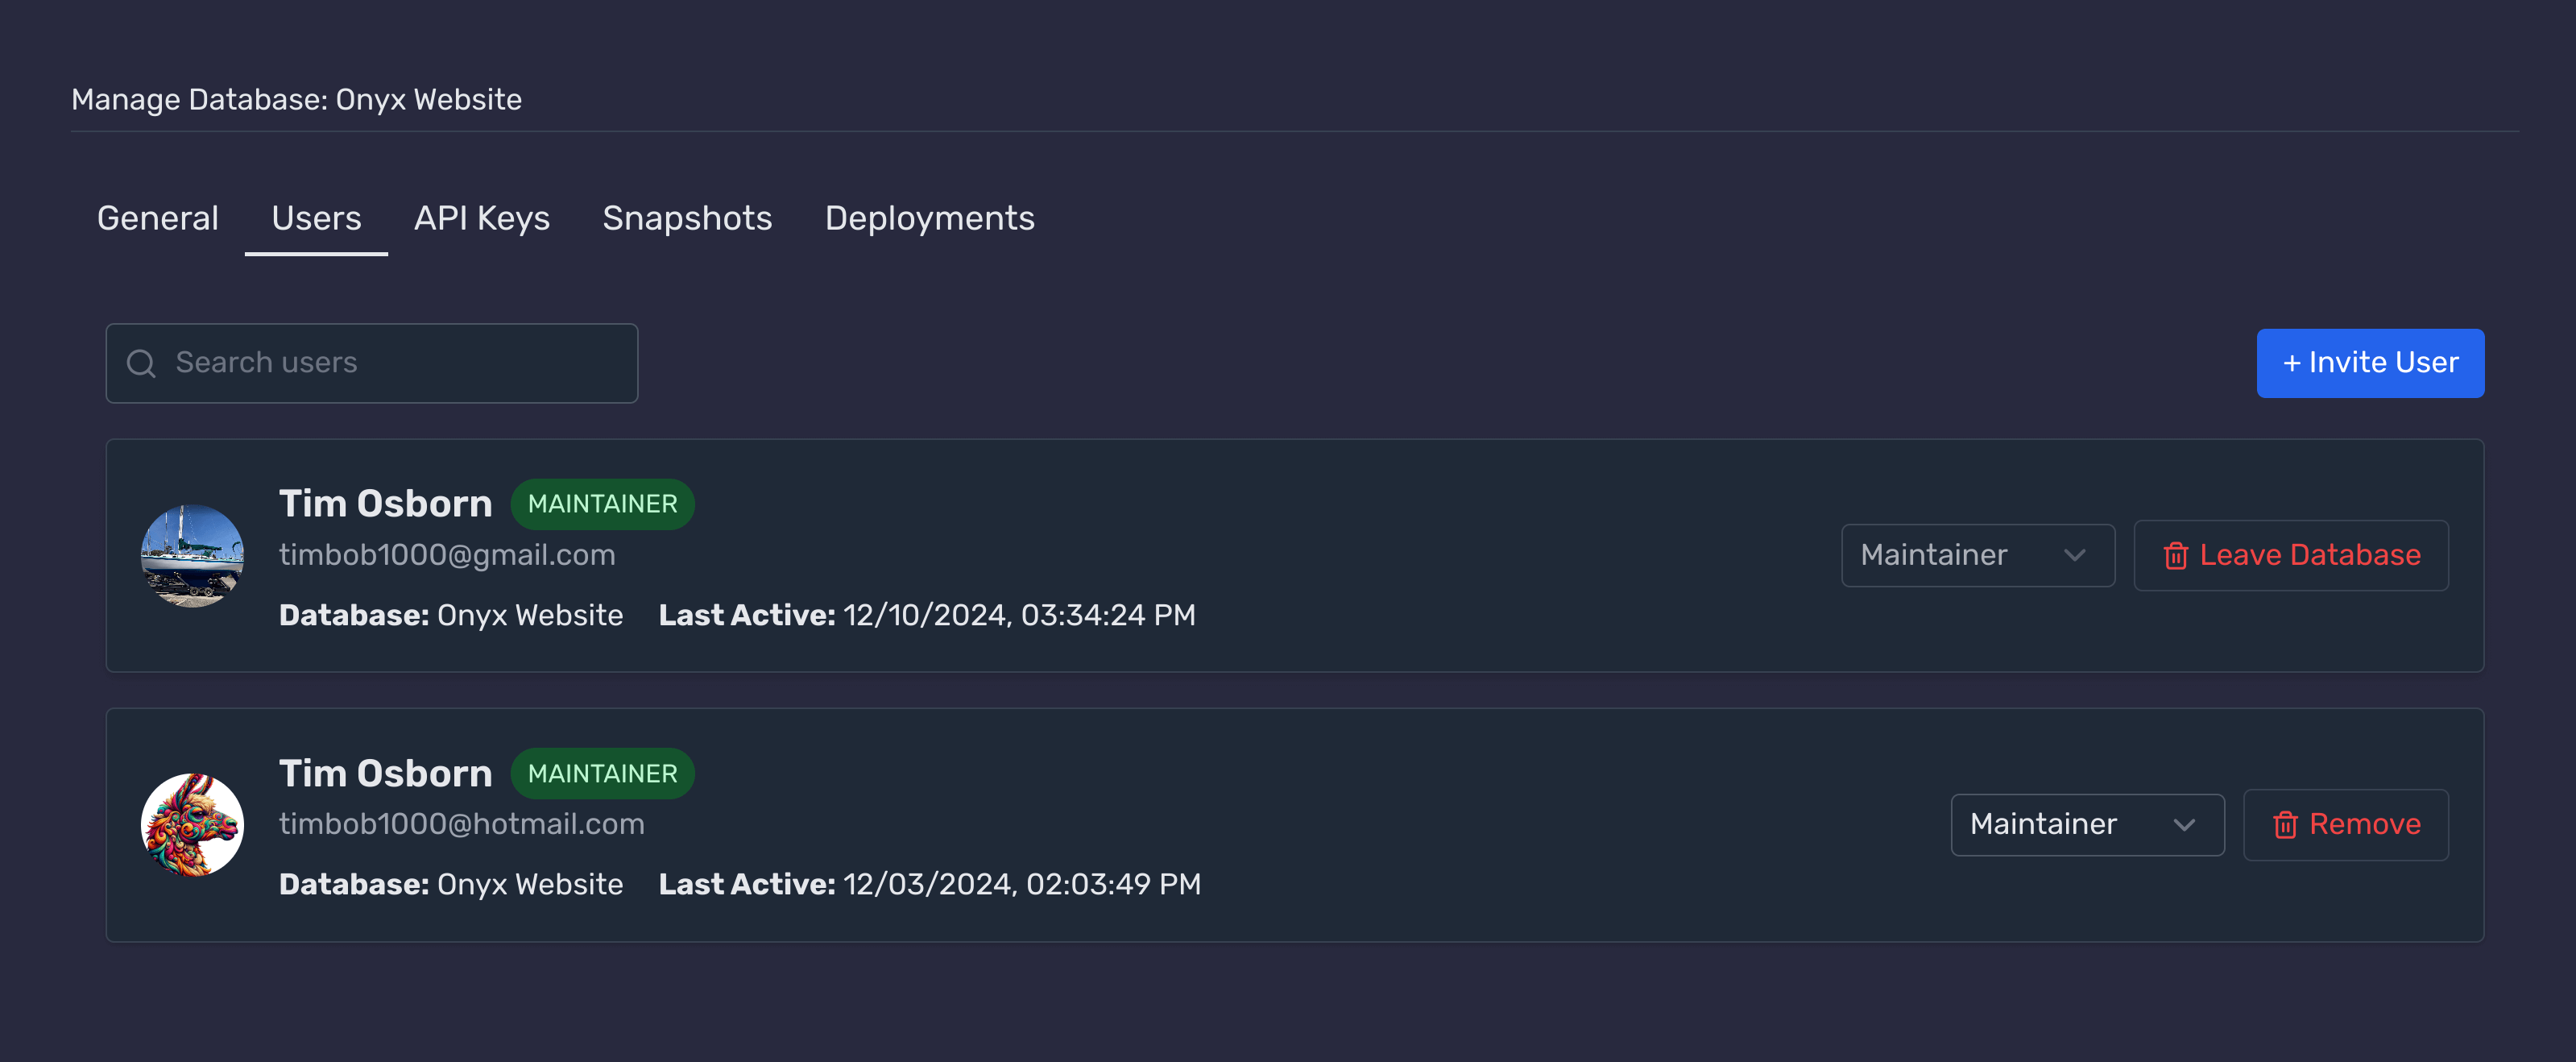
In the database overview, click on the Users tab to view and manage database users.

Inviting Users
Invite new users to your database by sending them an invitation email.
Click on Invite User
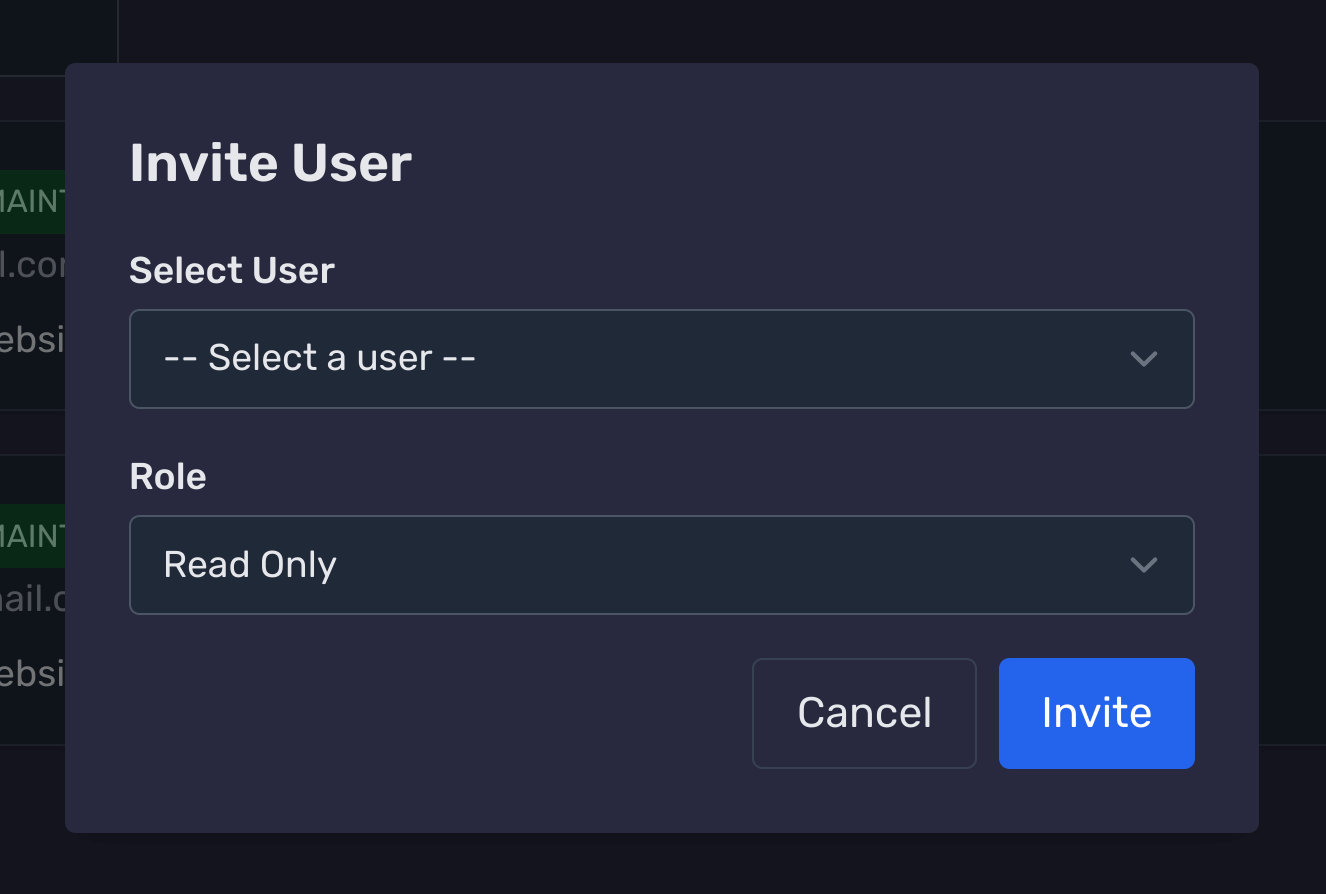
In the Users section, click on the + Invite User button to open the invitation modal.
Fill in User Details
In the invitation modal, enter the user's email address and select their role.
- Email Address: The email where the invitation will be sent.
- Role: Assign a role (e.g., Maintainer, Read/Write, Read Only).

Send Invitation
After filling in the details, click Send Invitation. The user will receive an email with instructions to join the database.
Changing User Roles
Modify the permissions of existing users by changing their assigned roles.
Locate the User
In the Users section, find the user whose role you want to change.
Select New Role
Click on the current role dropdown next to the user's name and select a new role from the options.
Save Changes
After selecting the new role, the change is saved automatically. The user will receive an email notification about their updated permissions.
Removing Users
Remove users from your database to revoke their access and permissions.
Find the User to Remove
In the Users section, locate the user you wish to remove from the database.
Click on Remove
Click the Remove button next to the user's name. A confirmation modal will appear.
Confirm Removal
In the confirmation modal, confirm that you want to remove the user. Once confirmed, the user will no longer have access to the database.
Best Practices
Follow these best practices to effectively manage your database users and maintain security.
- Regularly review user roles and permissions to ensure they are up-to-date.
- Remove access for users who no longer need it to minimize security risks.
- Use the principle of least privilege by assigning the minimum necessary permissions to users.
- Monitor user activity to detect any unauthorized access or anomalies.
Next Steps
Need Help?
If you have any questions or need assistance:
- Email:support@onyx.dev
- Documentation: Visit ourHelp Centerfor tutorials and FAQs.