Managing Snapshots in Onyx Cloud Database
This guide will help you understand how to create snapshots of your databases and revert to previous snapshots when needed.
Creating a Snapshot
Snapshots allow you to capture the current state of your database. Follow these steps to create a snapshot.
Navigate to the Snapshots Page
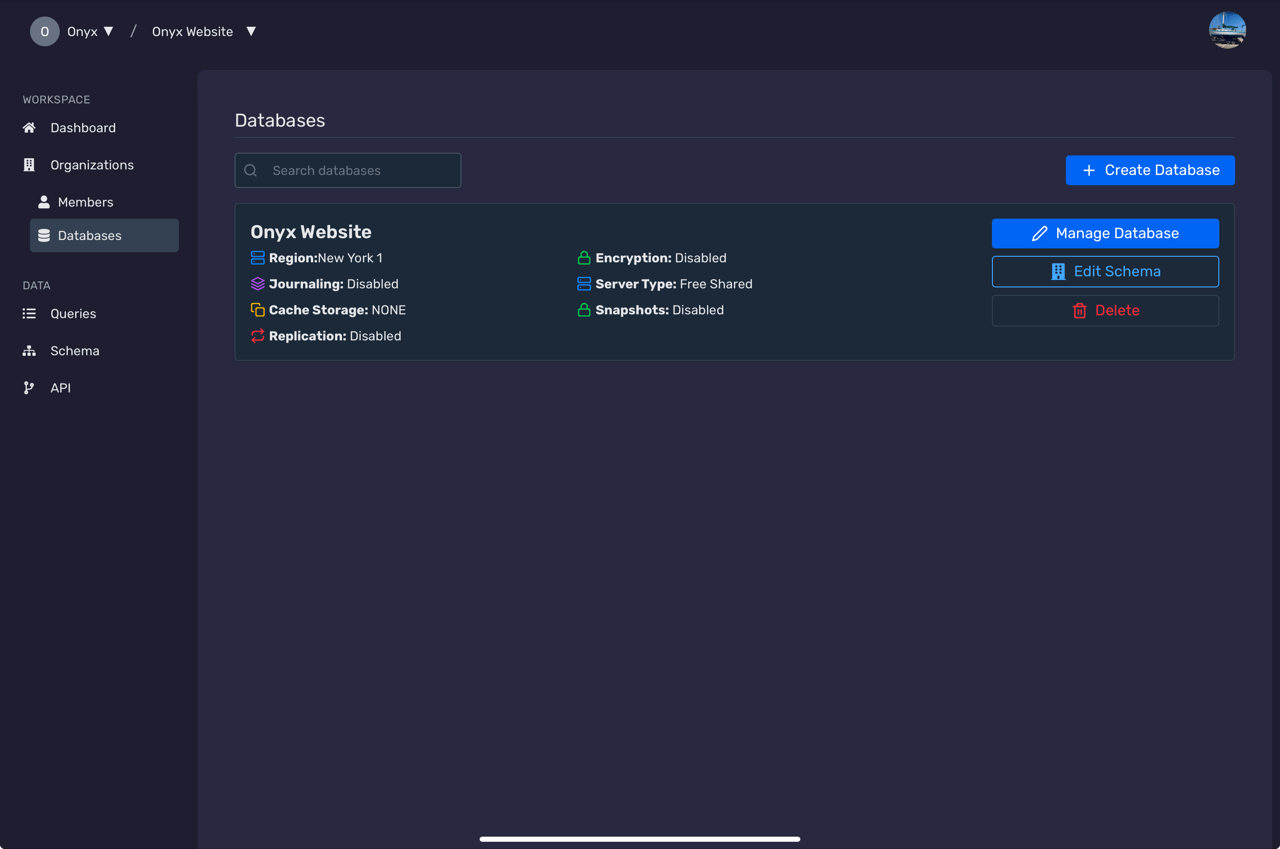
From your dashboard, click on the Databases tab, then select the database you wish to snapshot.

Access the Snapshots Section
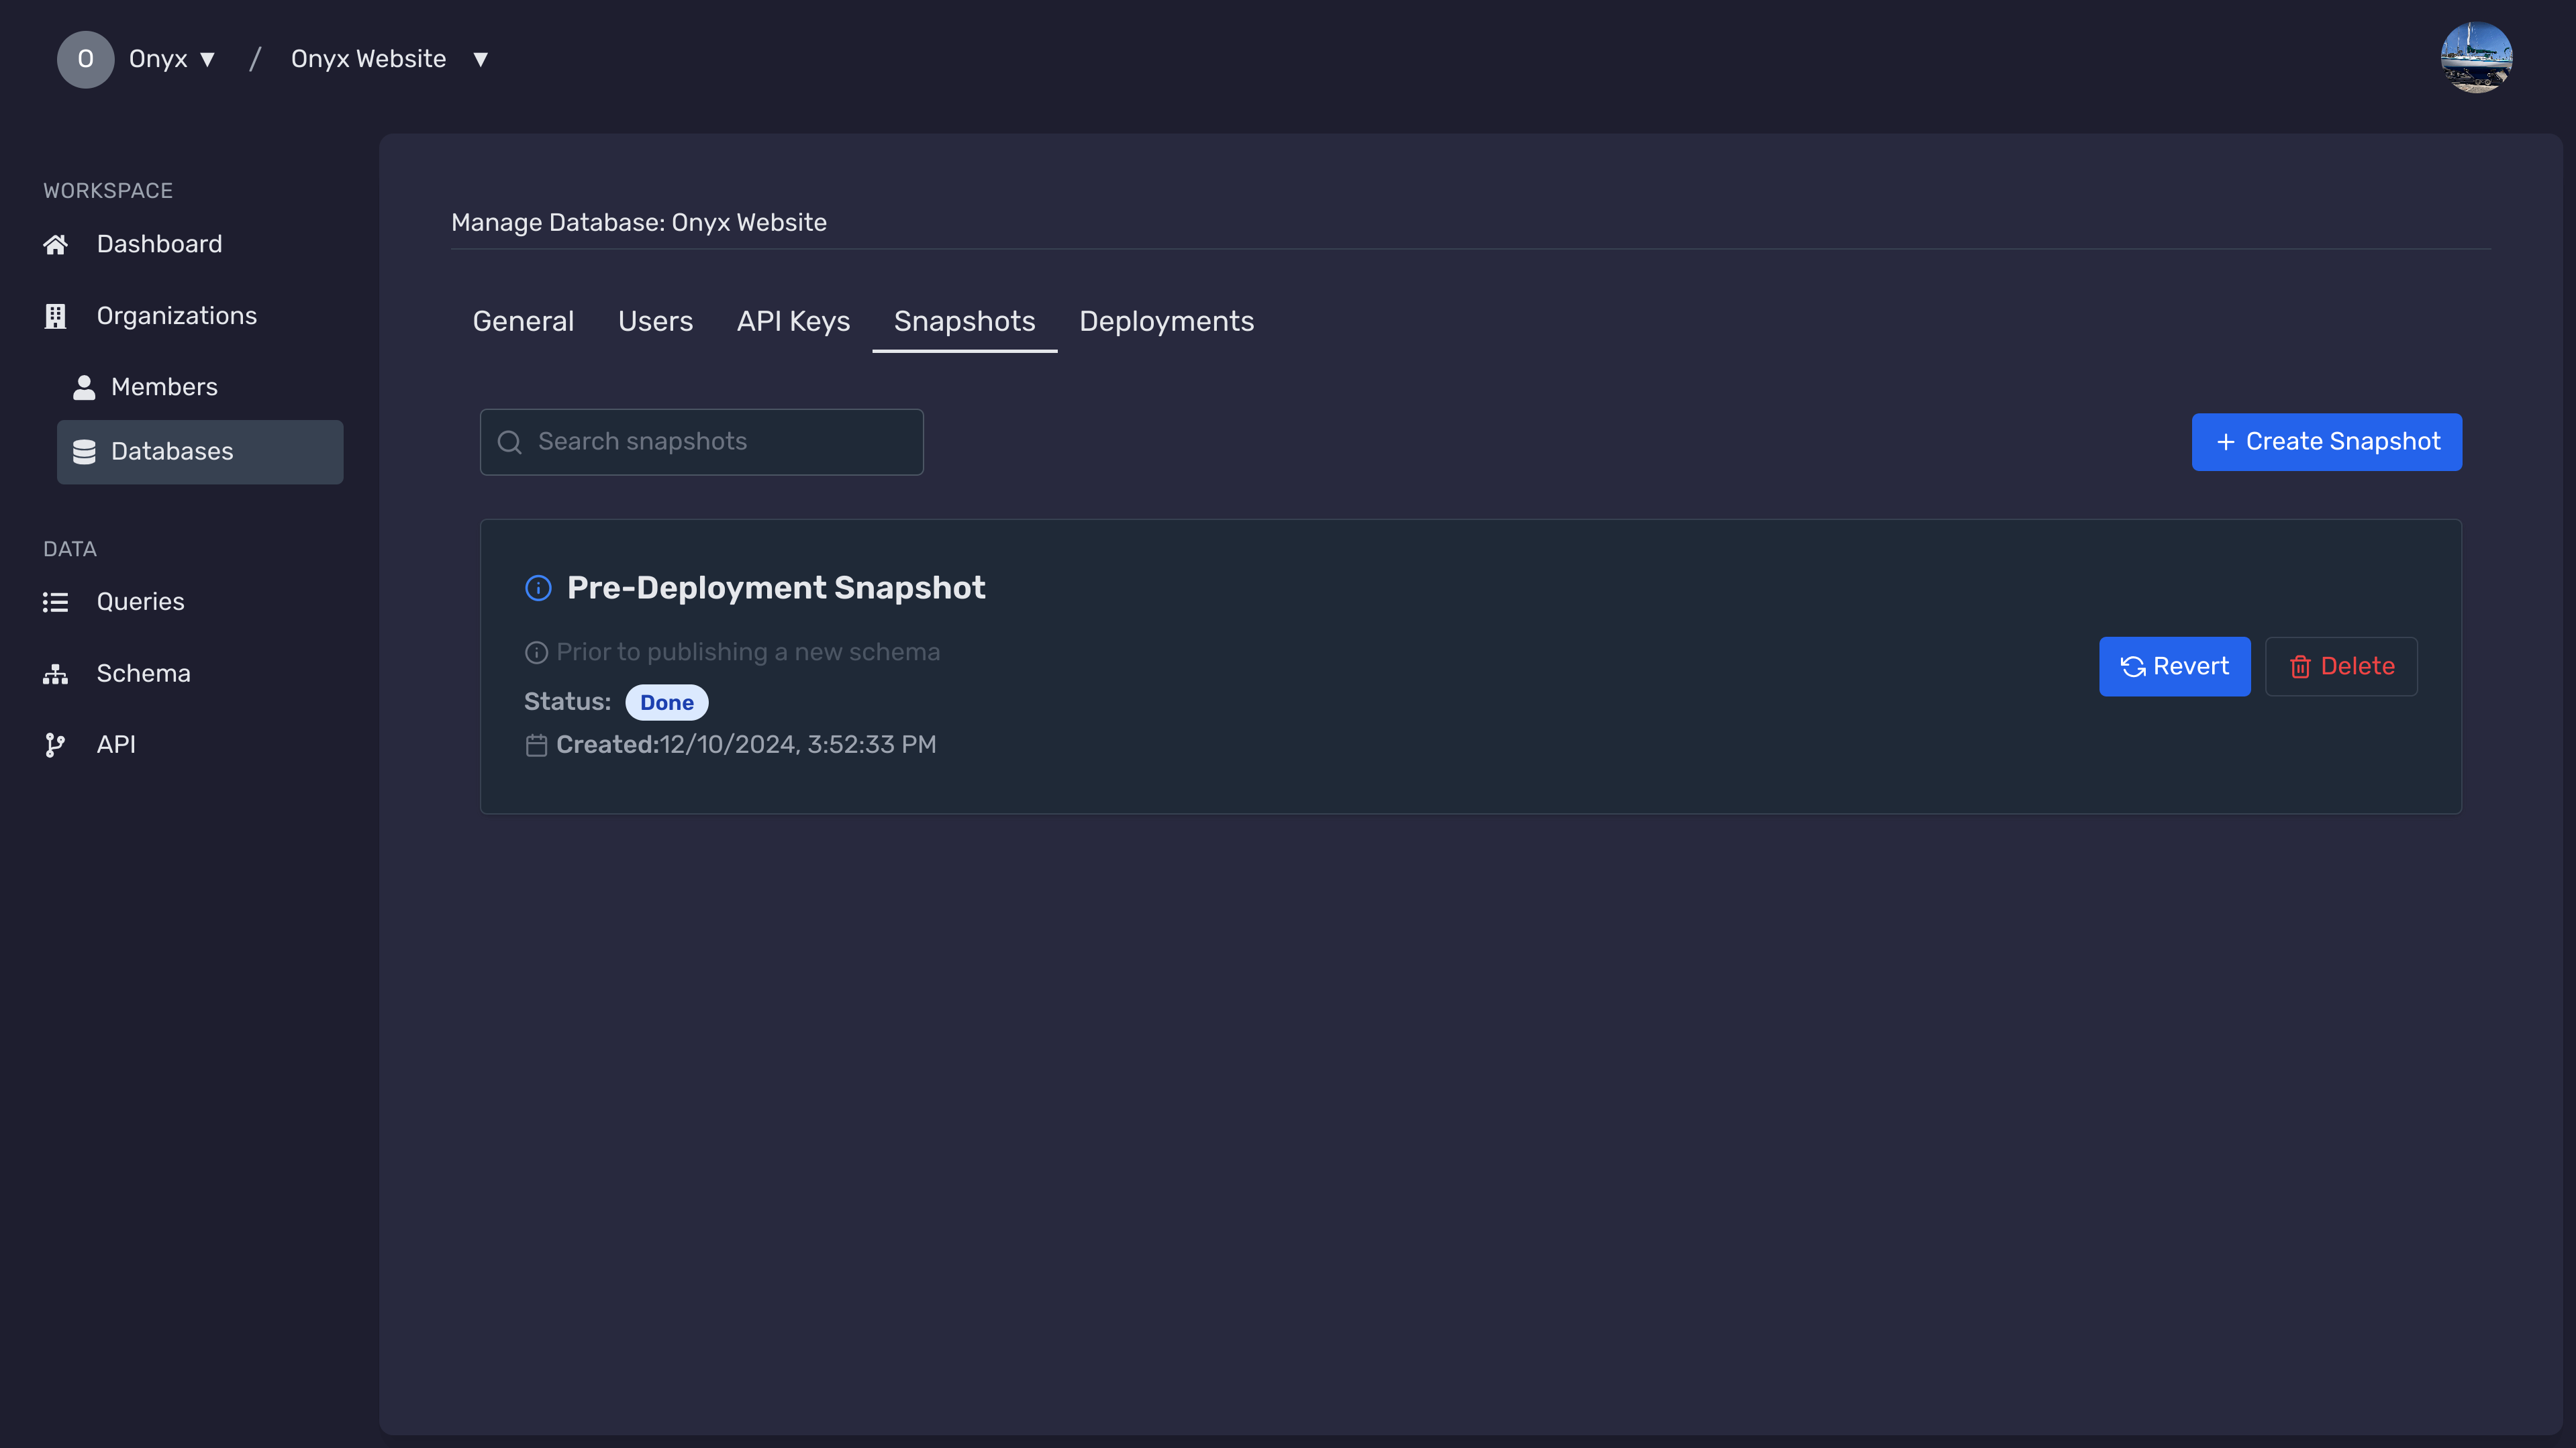
Within the selected database's overview, navigate to the Snapshots tab to manage your snapshots.

Create a New Snapshot
Click on the Create Snapshot button to initiate a new snapshot.
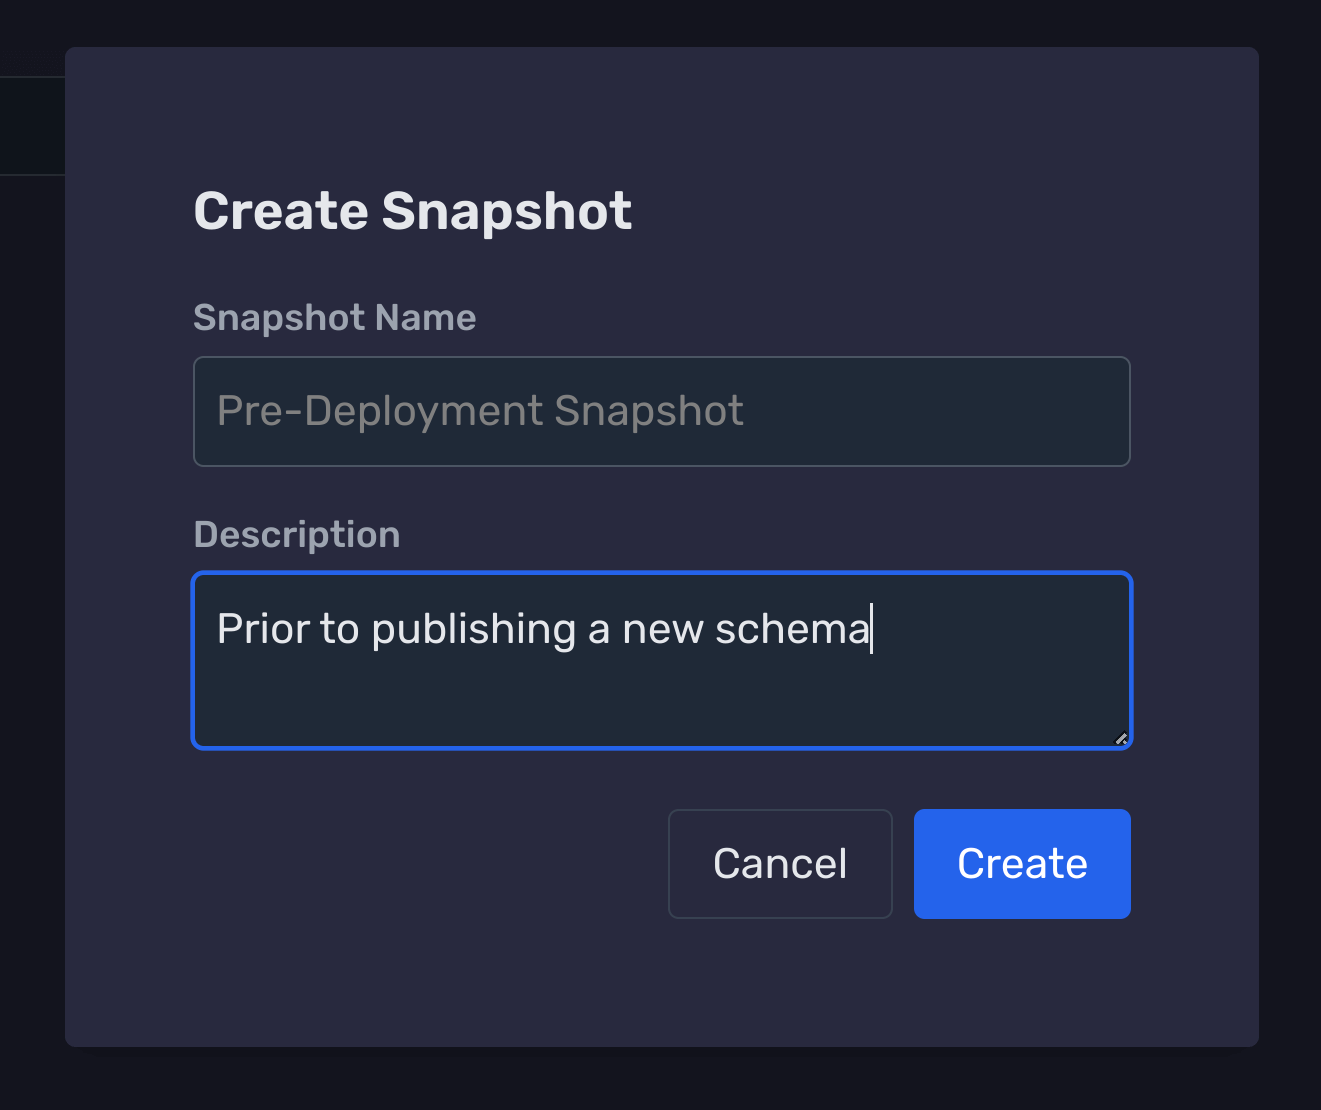
Provide Snapshot Details
Fill in the required details for your snapshot:
- Name: Assign a unique name to your snapshot.
- Description: (Optional) Add a description for future reference.

Confirm and Create
After filling in the details, click the Create button to finalize the snapshot creation.
You will receive a confirmation once the snapshot is successfully created.
Reverting to a Snapshot
Reverting to a snapshot allows you to restore your database to a previous state. Follow these steps to revert.
Navigate to the Snapshots Page
From your dashboard, click on the Databases tab, then select the database you wish to revert.

Access the Snapshots Section
Within the selected database's overview, navigate to the Snapshots tab.

Select the Desired Snapshot
Browse through the list of available snapshots and select the one you want to revert to by clicking on it.
Initiate Reversion
Click the Revert button associated with the selected snapshot.
Confirm Reversion
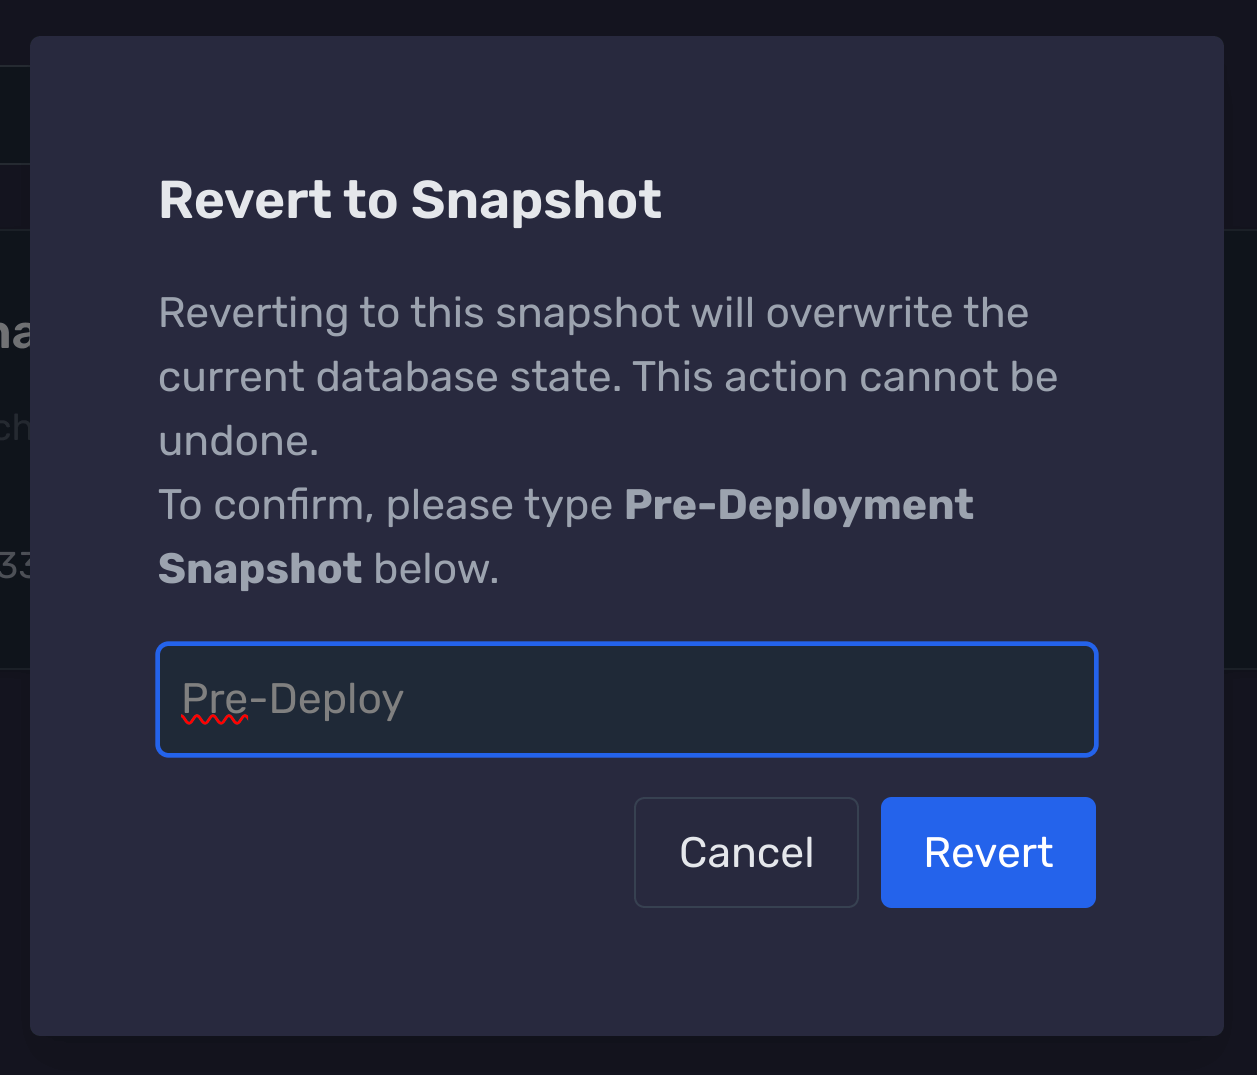
A confirmation dialog will appear. Confirm the action by typing the snapshot name and clicking Confirm.

Once confirmed, the database will revert to the selected snapshot. This action cannot be undone.
Verification
After the reversion process completes, verify that your database has been restored to the snapshot state.
You can check the database status and ensure all data reflects the snapshot's state.
Next Steps
Need Help?
If you have any questions or need assistance:
- Email:support@onyx.dev
- Documentation: Visit ourHelp Centerfor tutorials and FAQs.