Managing Your Database on Onyx Cloud
This guide will walk you through managing your database within the Onyx Cloud Dashboard. You'll learn how to navigate the General Info tab, start and stop your database, and perform essential management tasks.
General Info
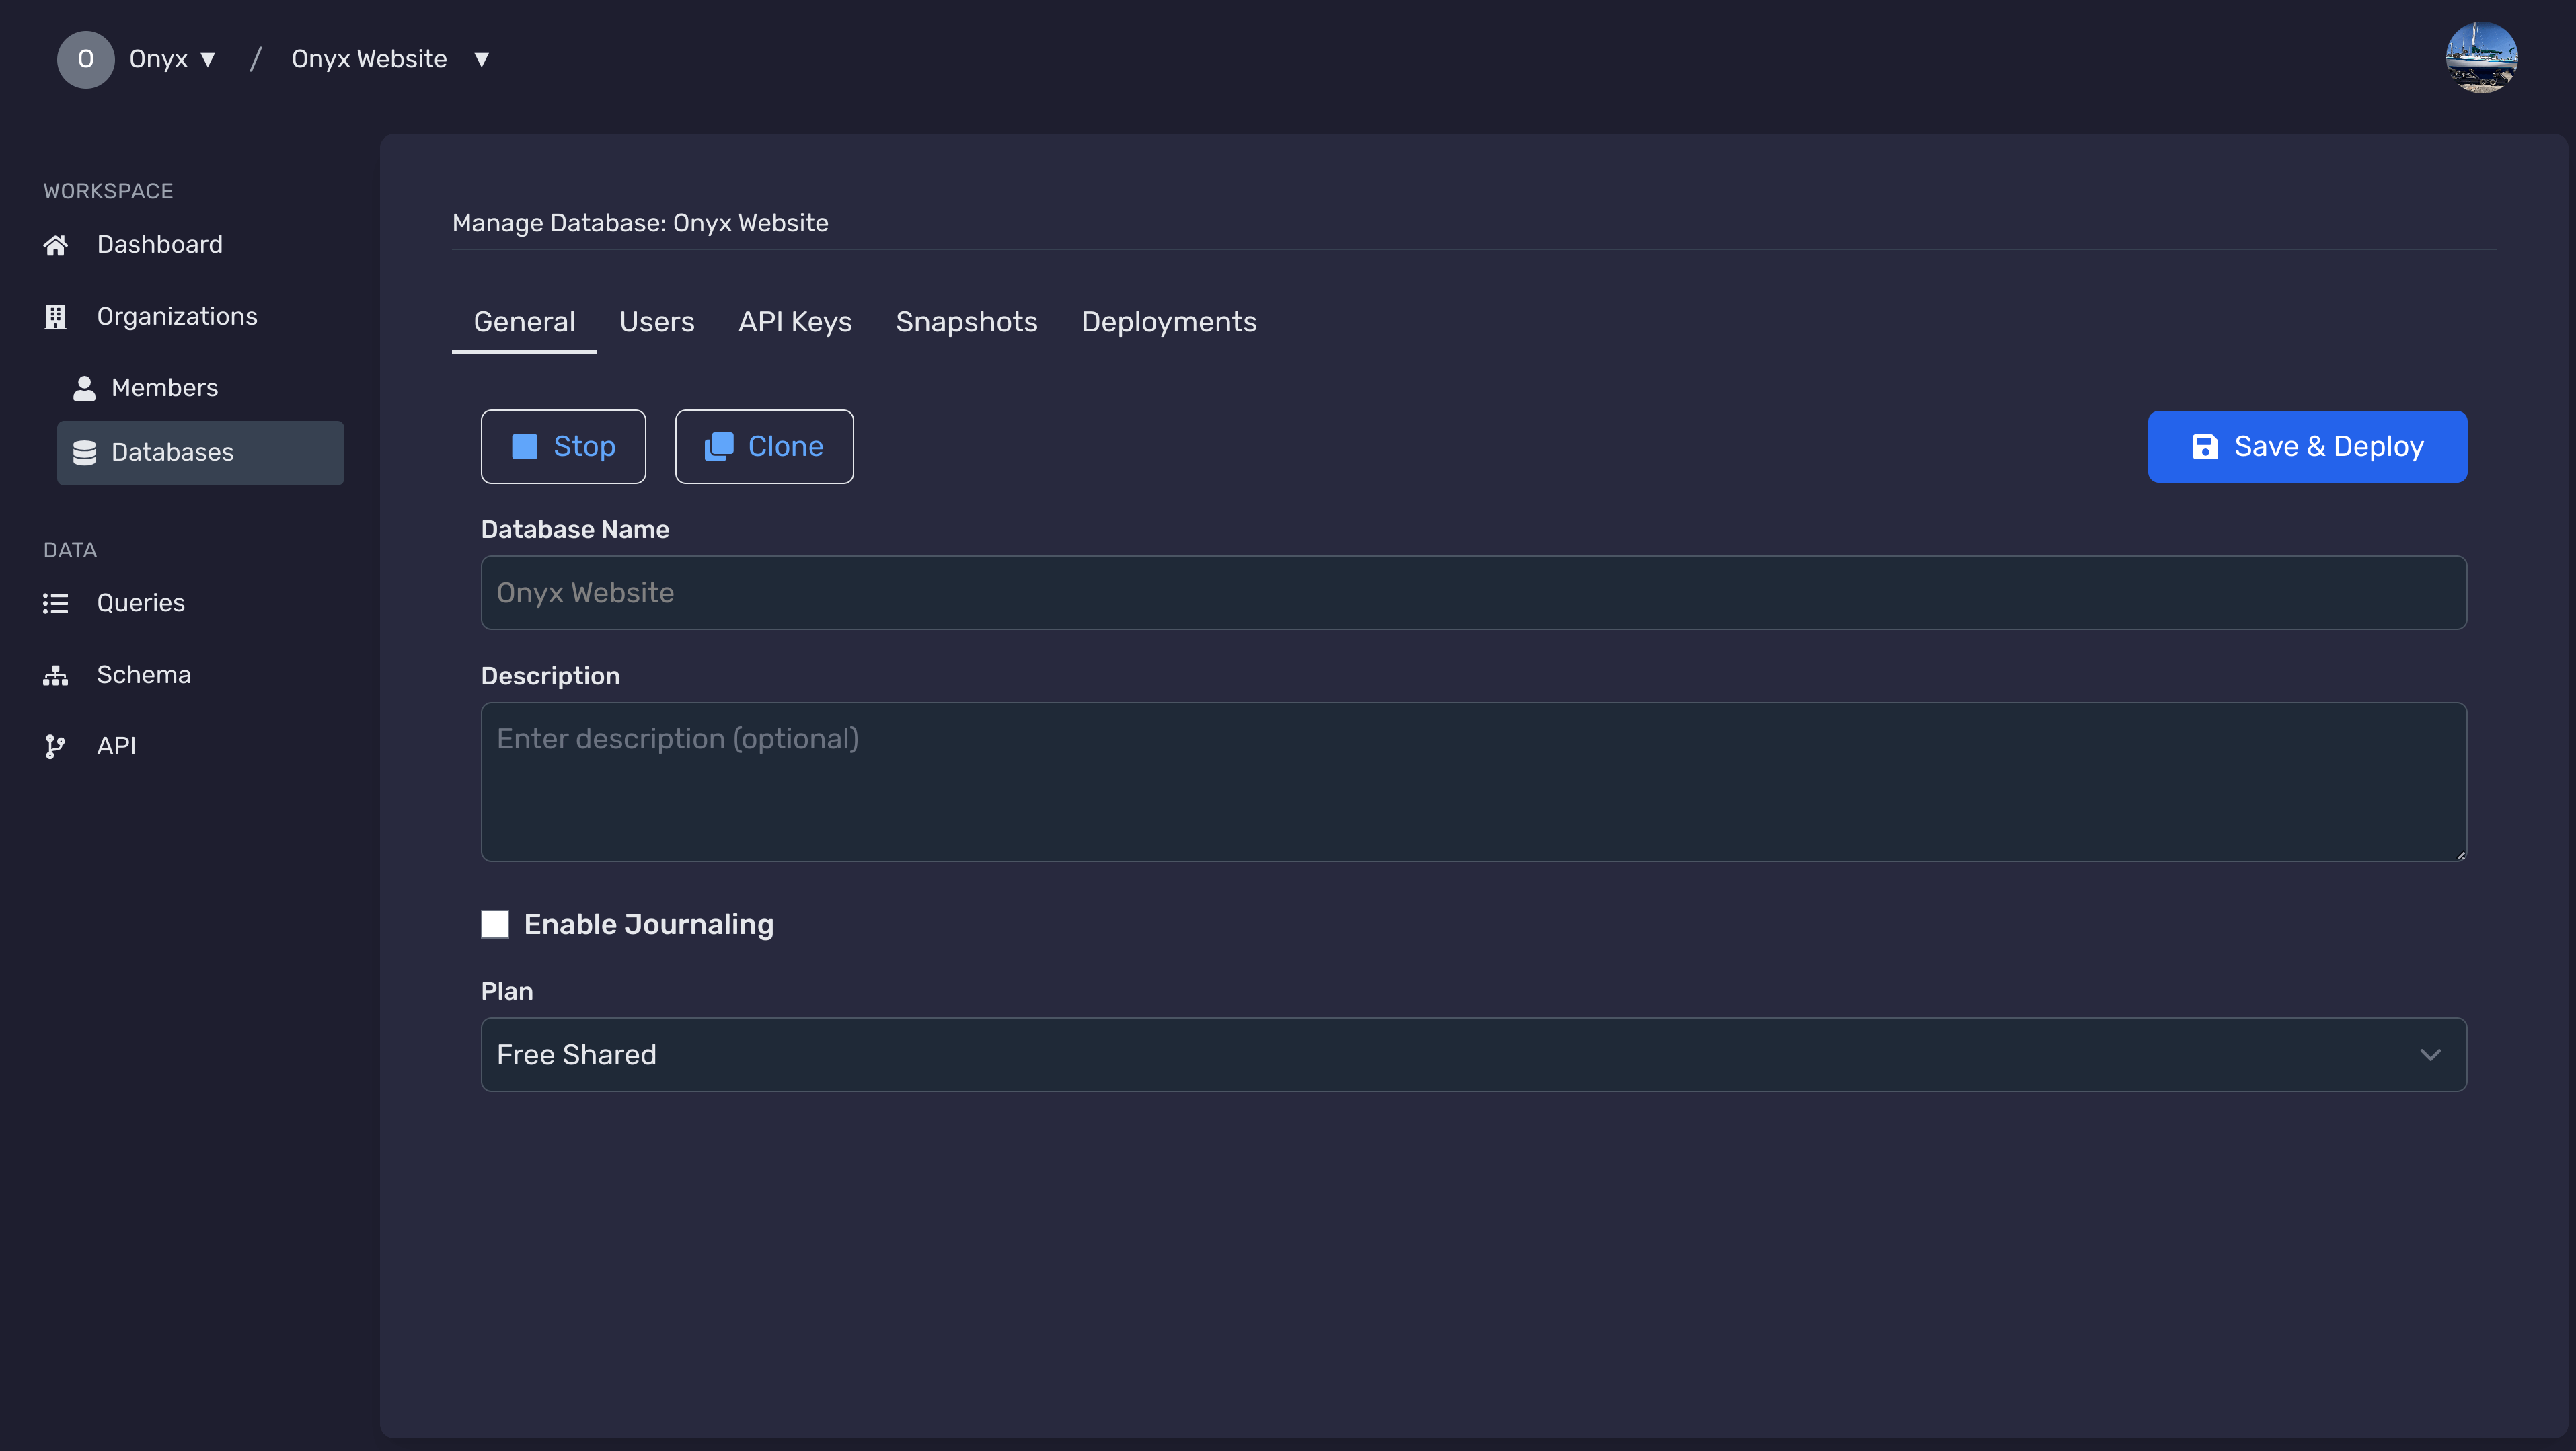
The General Info tab provides an overview of your database's configuration and status. Here, you can view and update essential details such as the database name, description, and associated settings.
Access the General Info Tab
From your dashboard, select the database you wish to manage. Click on the General Info tab to view its details.

Update Database Details
In the General Info tab, you can update various details of your database:
- Database Name: Click the edit icon next to the name to modify it.
- Description: Provide a brief description to identify the purpose of the database.
- Tags: Add or remove tags to categorize your database for easier management.
Save Your Changes
After making the necessary updates, click the Save & Deploy button at the top-right corner to apply your changes. A success message will appear upon successful update.
Starting a Database
Starting your database is essential when you want to make it active and available for operations. Follow the steps below to start your database.
Navigate to Your Database
From the dashboard, select the database you wish to start by clicking on its name.
Click the Start Button
In the General Info tab, locate the Start button. Click it to initiate the starting process.
Confirm the Action
A confirmation modal will appear. Click Start to proceed. The database status will update to Starting... while the process completes.
Verify the Status
Once the database has started, the status will change to Running. You can now perform operations on your database.
Stopping a Database
Stopping your database is useful when you want to temporarily disable it to save resources. Follow the steps below to stop your database.
Navigate to Your Database
From the dashboard, select the database you wish to stop by clicking on its name.
Click the Stop Button
In the General Info tab, locate the Stop button. Click it to initiate the stopping process.
Confirm the Action
A confirmation modal will appear. Click Stop to proceed. The database status will update to Stopping... while the process completes.
Verify the Status
Once the database has stopped, the status will change to Shutdown. The database is now inactive and will not consume resources until started again.
Next Steps
Need Help?
If you have any questions or need assistance:
- Email:support@onyx.dev
- Documentation: Visit ourHelp Centerfor tutorials and FAQs.